Work Area
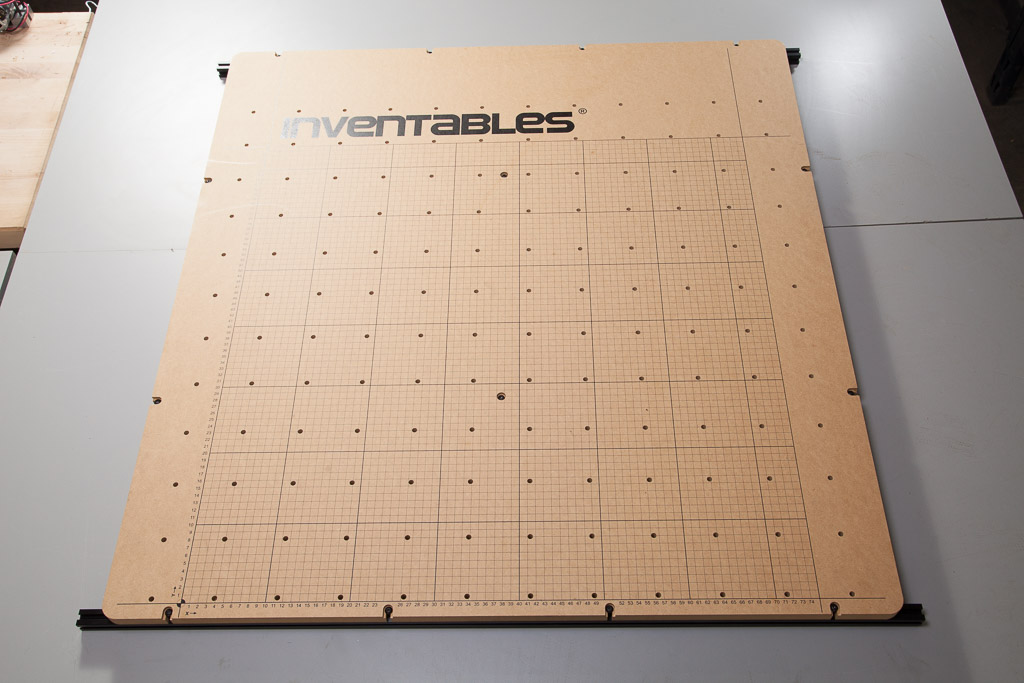
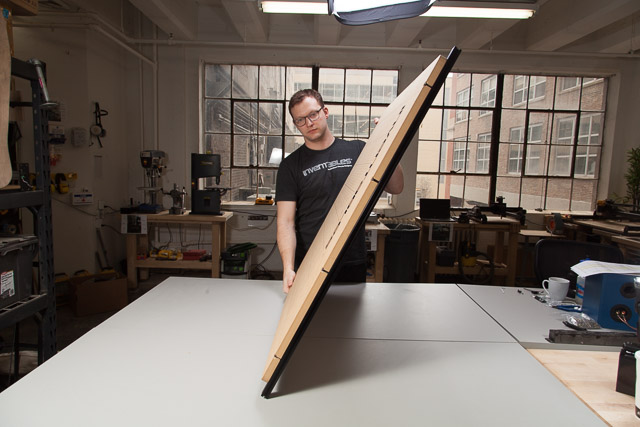
Now it’s time for the final physical piece of your X-Carve, the work area. This is a disposable item that you will cut into many times. Don’t worry too much about keeping it pretty, but do try your best to install it as square as possible to the rest of the machine.
Click below to set up your chosen work area.
500mm Work Area
| 500mm Waste Board Kit | ||
| SKU | Name | Quantity |
| 30535-01 | Waste Board | 1 |
| 30517-03 | Threaded Insert M5 | 36 |
| 25286-19 | Button Head Cap Screw M5 x 12mm | 6 |
| 25281-05 | T-Slot Nut M5 Pre-Assembly (Insertion Nut) | 6 |
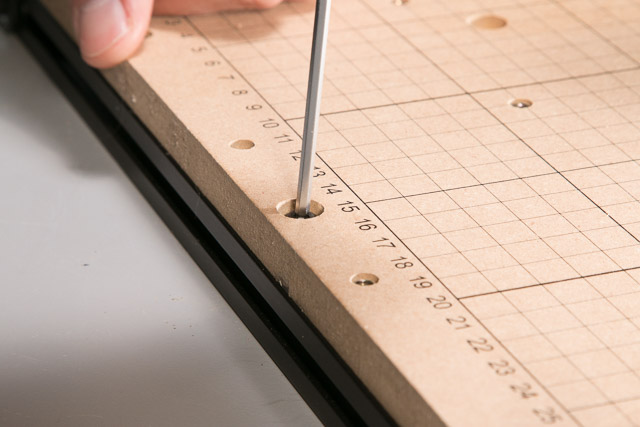
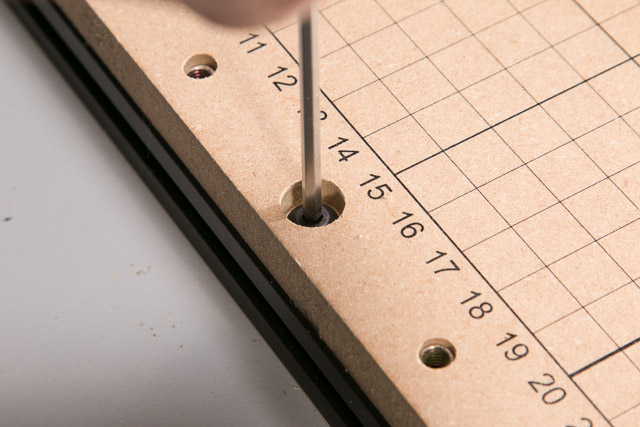
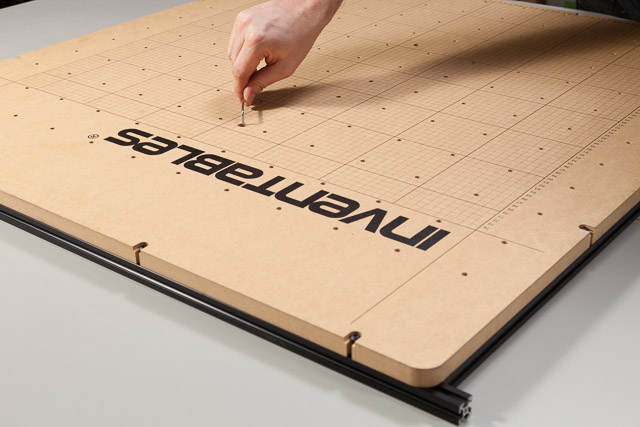
1. Drive Threaded Inserts into Waste Board
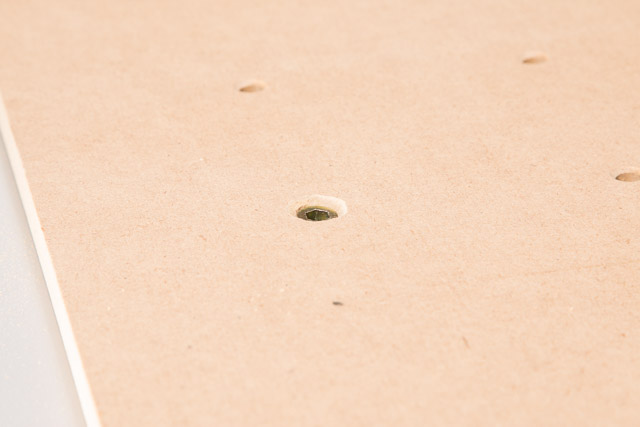
Now you’ll put a threaded insert into each of the countersunk holes from the back side. Drive the insert so that the head is flush or sub flush with the back side of the waste board.
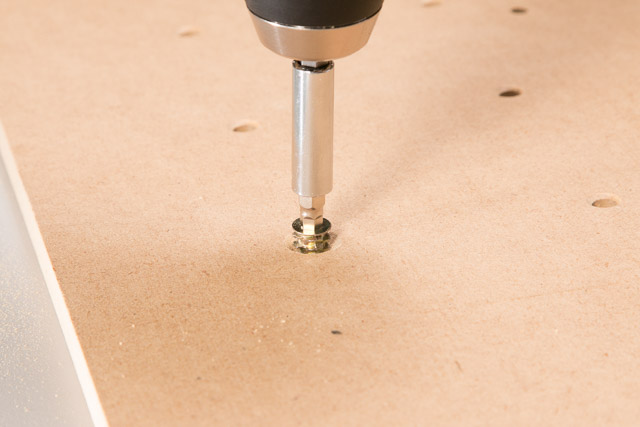
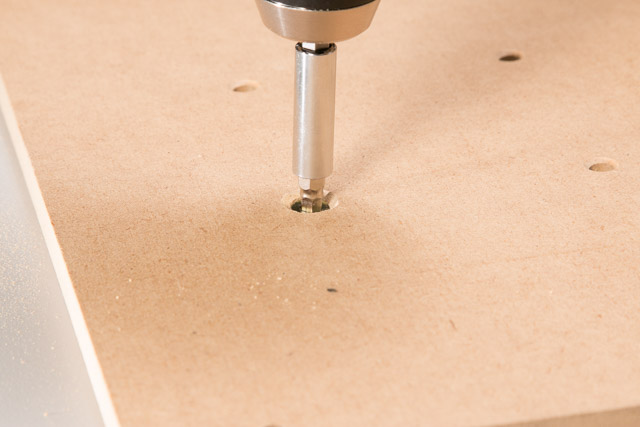
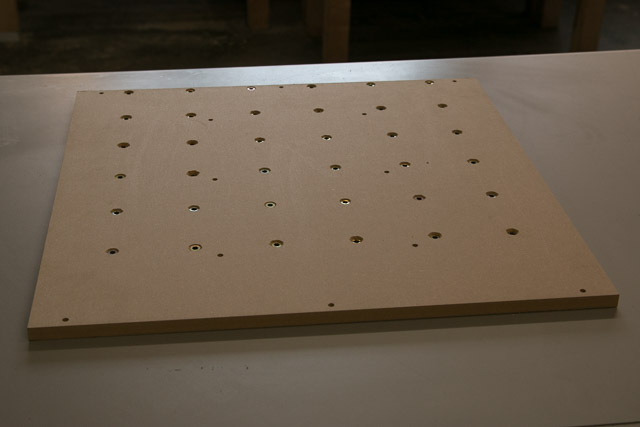
Be careful not to use too much force when driving the inserts in.
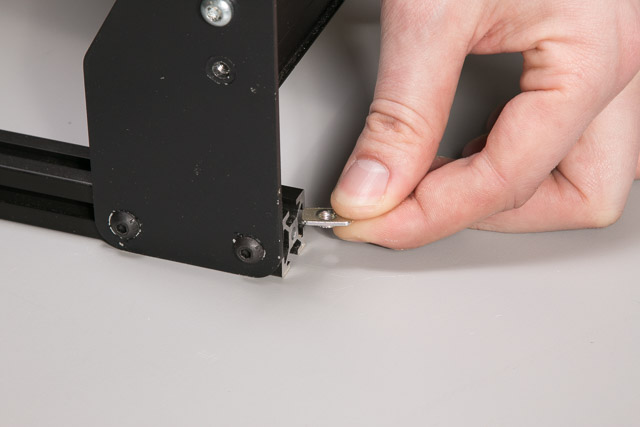
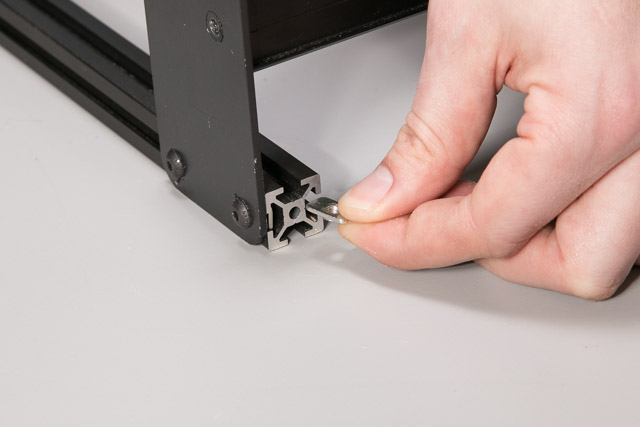
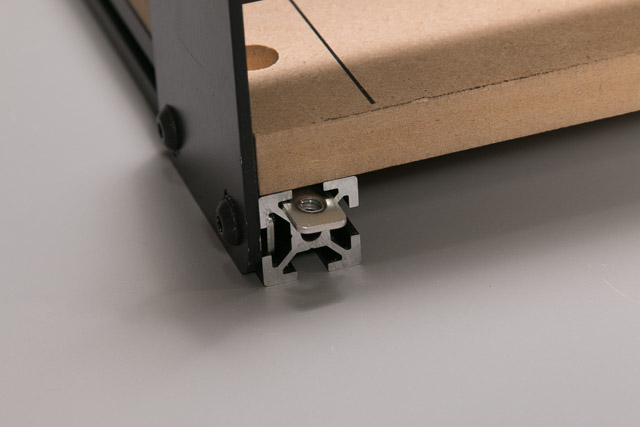
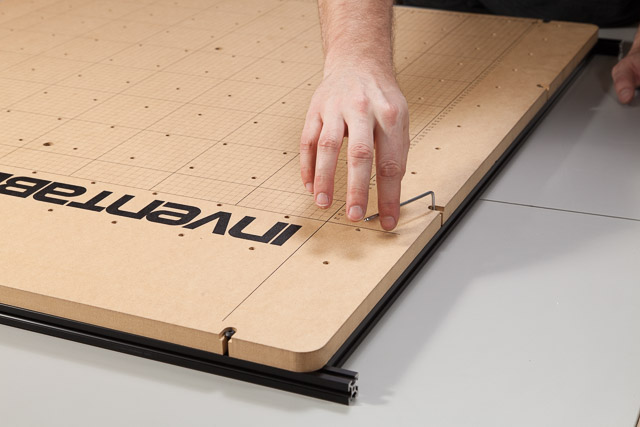
2. Insert the Insertion Nuts
Now you’ll put insertion nuts into the extrusions that connect your y-axes. Put one insertion nut in the middle of each extrusion (don’t worry about finding the exact middle).
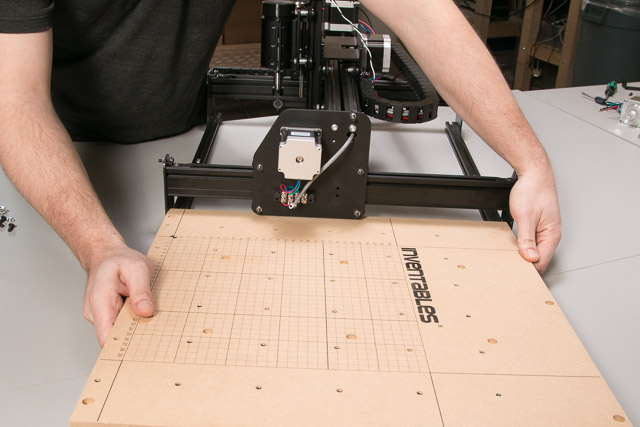
Slide the waste board onto the extrusions of your X-carve. You’ll want ’Inventables" to be facing the front of the machine. Put a 12mm screw through the middle mounting holes of the waste board and tighten them all the way down, then back them off a full turn.
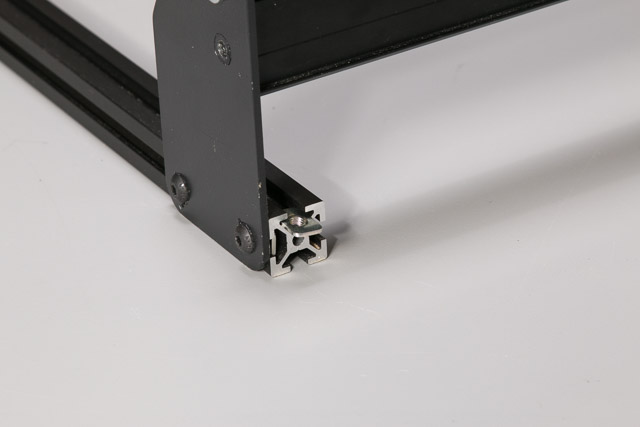
Now insert the other four insertion nuts from each of their respective corners and capture them with screws through the waste board.
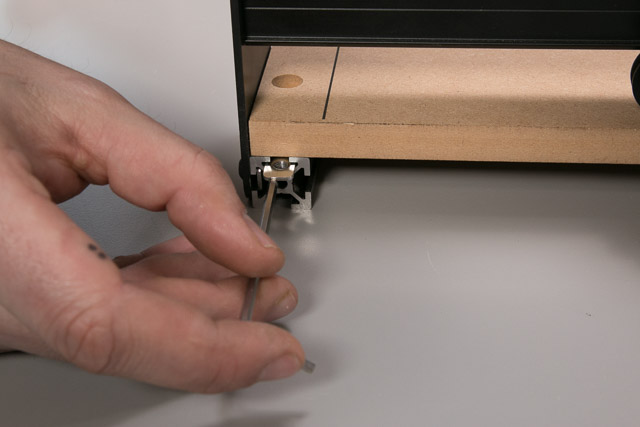

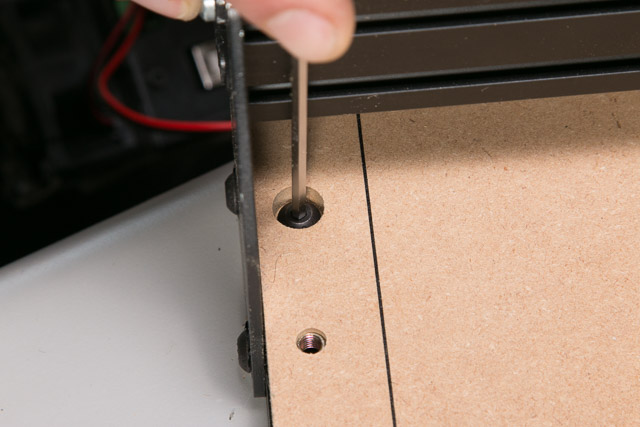
Remember to back off each screw a full turn after tightening them down; this will ensure that the waste board can slide left and right, which will make it easier to align the mounting holes with the insertion nuts.
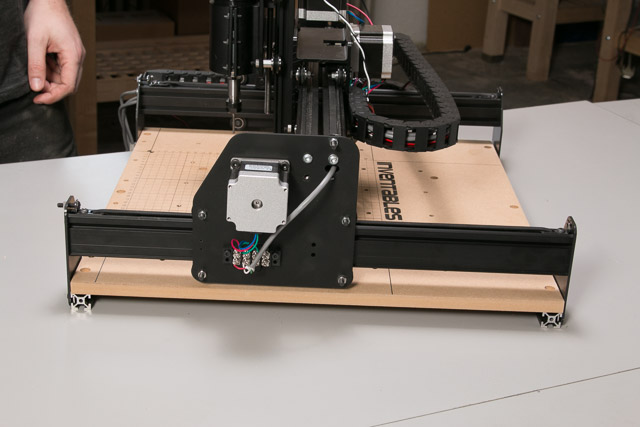
When all of your insertion nuts and mounting screws are in and the waste board is centered, tighten them down.

If you purchased drag chain with your 500mm X-Carve now’s the time to install the last bracket to hold it in place.
3. Mount the Drag Chain Bracket

| 500mm Drag Chain Kit | ||
| SKU | Name | Quantity |
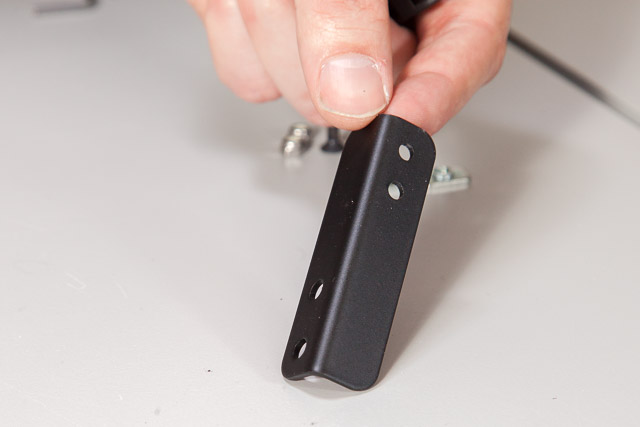
| 30586-02 | Drag Chain Extrusion Angle Bracket | 1 |
| 25281-05 | T-Slot Nut M5 Pre-Assembly | 2 |
| 25286-17 | Button Head Cap Screw M5 x 8mm | 2 |
| 30554-01 | Flat Head Socket Cap Screw M4 x 10mm | 2 |
| 30265-03 | Nylon Insert Lock Nut M4 | 2 |
| 30331-09 | Female Drag Chain End | 1 |
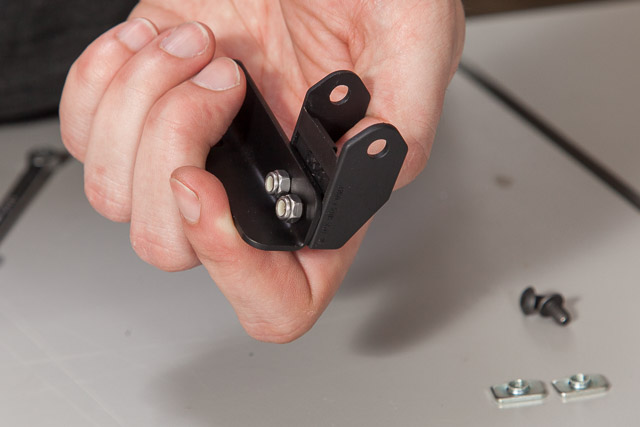
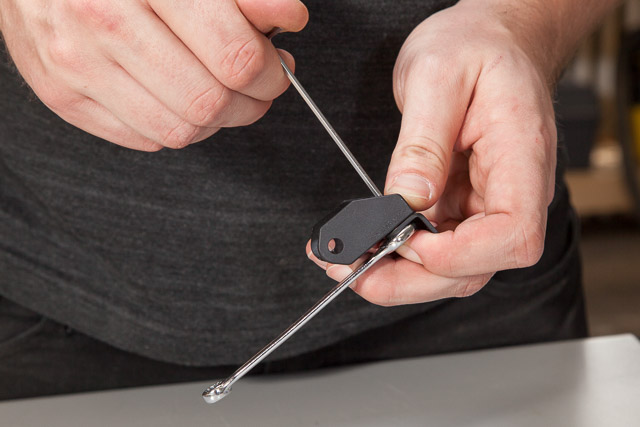
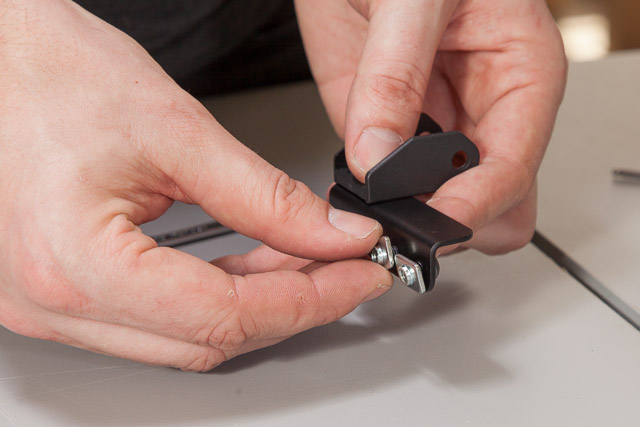
Attach the female drag chain end to the angle bracket like this (note: use the two smaller holes on the bracket):
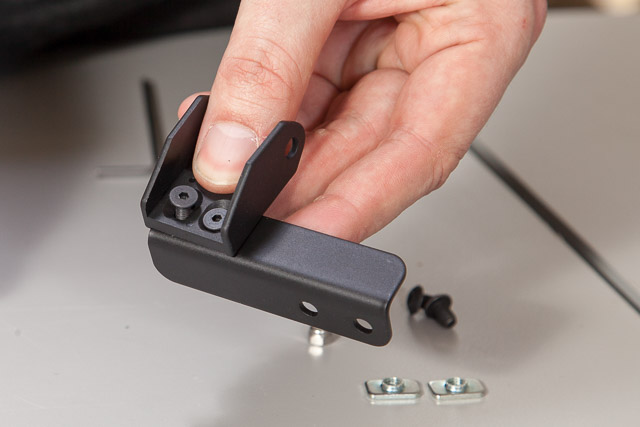
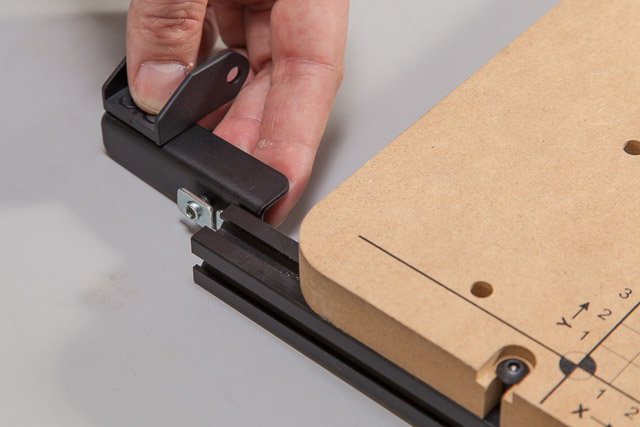
Use two insertion nuts and two M5 x 8mm screws to attach the assembly to the front of the work area like this:


Tape the wires that will travel with the Gantry to the bundle of wires that came through the X-Axis drag chain. Thread all wires through the Y-Axis drag chain.
Congratulations, you have just one more step to go!
1000mm Work Area
| 1000mm Waste Board Kit | ||
| SKU | Name | Quantity |
| 30537-01 | Waste Board 1000mm | 1 |
| 30517-03 | Threaded Insert M5 | 144 |
| 25286-20 | Button Head Cap Screw M5 x 20mm | 14 |
| 25281-05 | T-Slot Nut M5 Pre-Assembly (Insertion Nut) | 14 |
| 1000mm Rail Kit | ||
| SKU | Name | Quantity |
| 26049-02 | Aluminum Extrusion 20mm x 20mm Black 1000mm Lg | 2 |
| 26049-04 | Aluminum Extrusion 20mm x 20mm Black 958mm Lg | 3 |
| 26018-01 | Extrusion Bracket (Gusset) | 6 |
| 25286-18 | Button Head Cap Screw M5 x 10mm | 12 |
| 25281-05 | T-Slot Nut M5 Pre-Assembly | 12 |
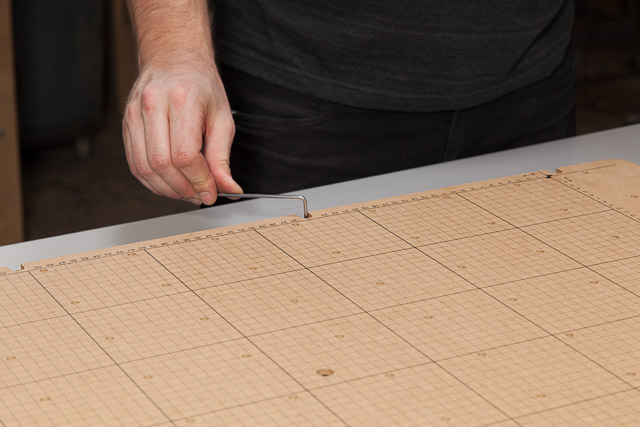
1. Drive Threaded Inserts into Waste Board
Now you’ll put a threaded insert into each of the countersunk holes from the back side. Drive the insert so that the head is flush or sub flush with the back side of the waste board.
Be careful not to use too much force when driving the inserts in.
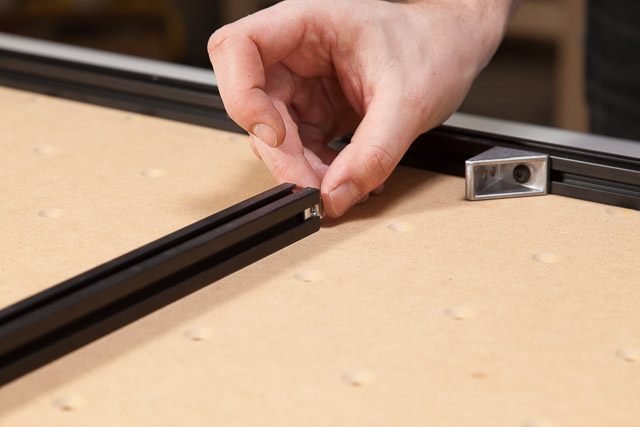
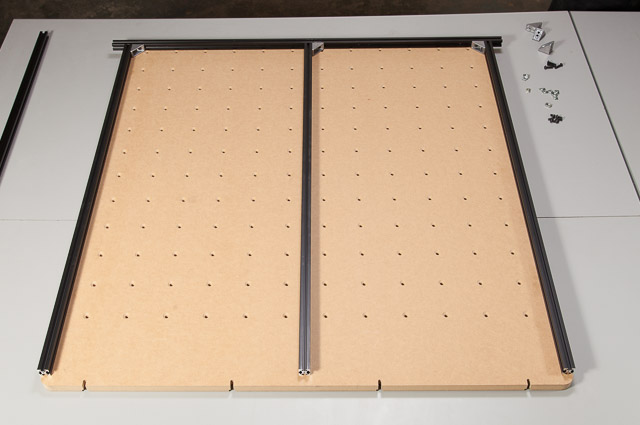
2. Build the First Half of the Frame
Start by identifying the three pieces of 20mm x 20mm extrusion that are 958mm and the two pieces that are 1000mm. We’ll call the 958mm pieces “shorter” and the 1000mm pieces “longer” for ease of communication.
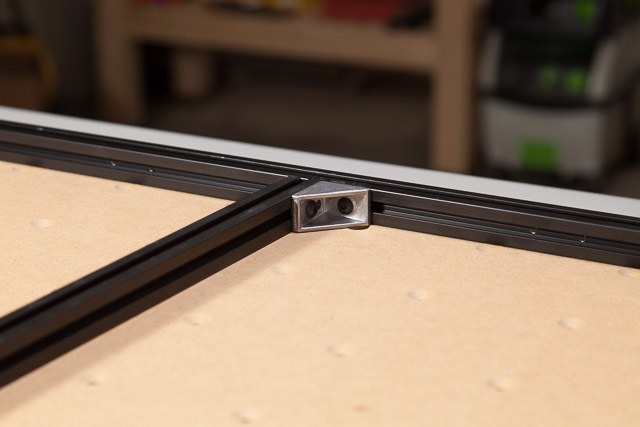
Give yourself some room to work with (preferably on a large table) as this waste board is a beast. Attach one longer piece and one shorter piece of extrusion with two T-Slot nuts, a gusset bracket and two button head cap screws like this:

You’ll notice that one side of each gusset bracket has two holes, it does not matter which hole you use.
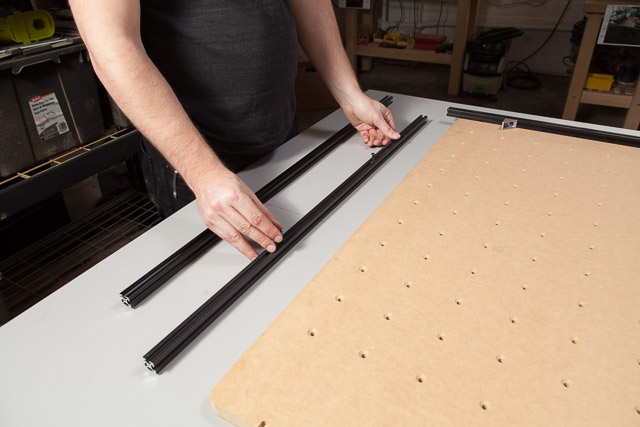
Then slide six t-slot nuts into the extrusions (four into the long, two into the short) and just barely thread six 20mm screws into them. You want the screws to be stable but just barely screwed in.


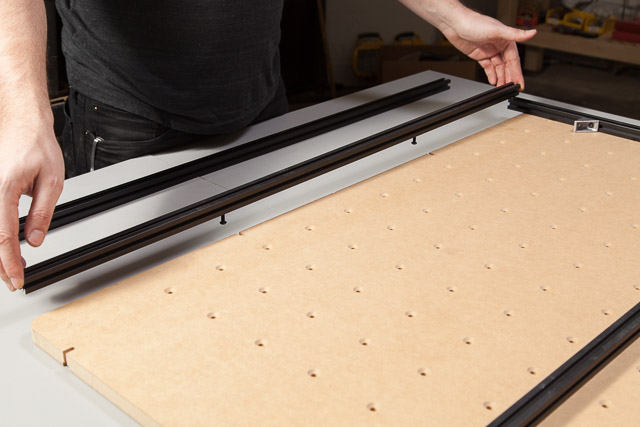
3. Attach the Waste board
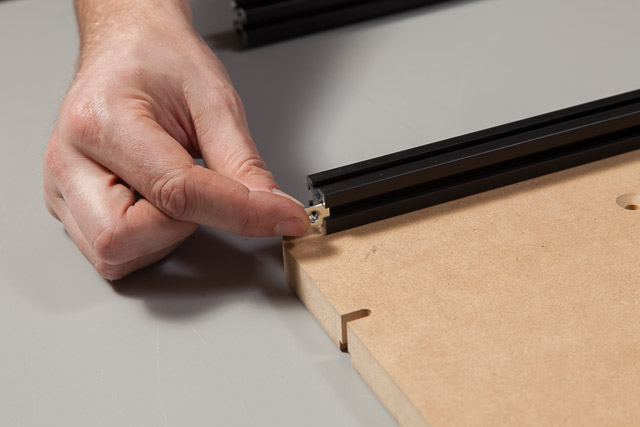
Now grab your waste board and put two 20mm screws through these holes:

Thread insertion nuts onto these screws from the underside of the waste board like this:

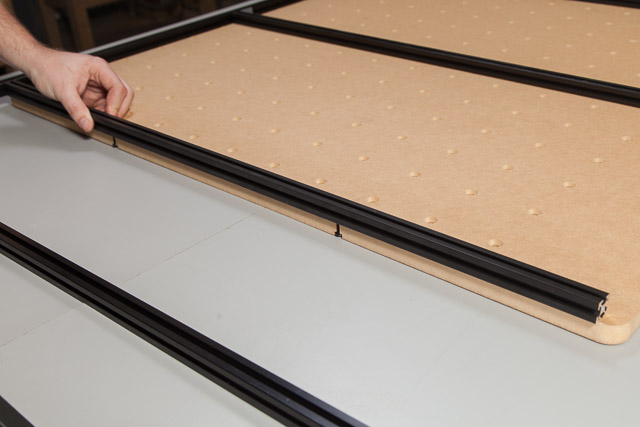
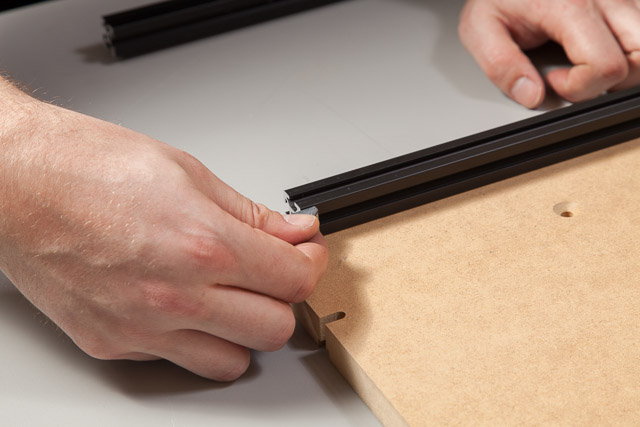
Slide a shorter extrusion onto these nuts like this:


Gently place your waste board onto your table:

Now align each 20mm screw with a slot on the waste board and pull it onto the longer extrusion like this:


You’ll want to tighten all four of these screws down and then back them off a full turn so the waste board can slide along the longer extrusion.
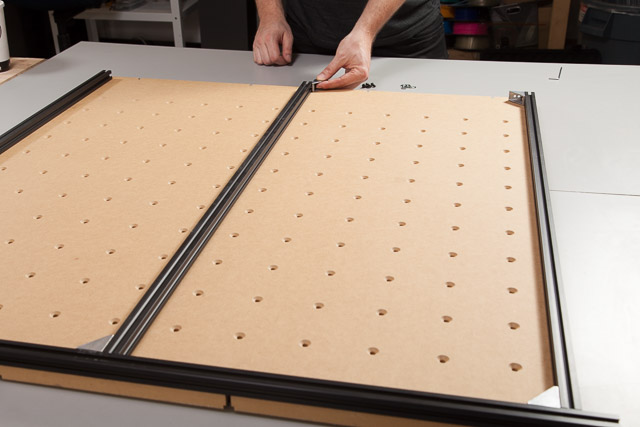
Now repeat the process for the shorter extrusion on the right side of the waste board.


4. Build the Second Half of the Frame
Now flip the waste board back over so it’s upside down again being sure to keep it fairly level so the shorter extrusion in the middle of the waste board doesn’t slide off.

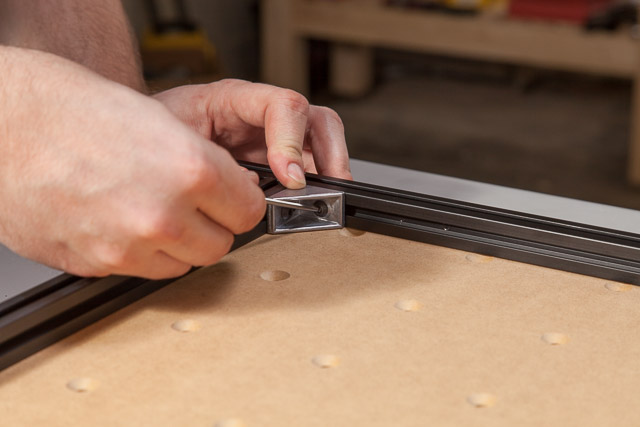
Put a 10mm M5 screw into a gusset bracket, thread an insertion nut onto it, slide it down the longer extrusion and attach it the middle shorter extrusion like this:
Slide another gusset bracket, t-nut and M5 screw assembly onto the longer extrusion like this:


Put two insertion nuts into your last shorter extrusion and just barely thread 20mm screws into them. Hold the assembly with the screw heads facing down and slide them into the corresponding slots on the waste board like this:

Slide another insertion nut into that last shorter extrusion and connect it to the longer extrusion like this:

You’re so close to finishing this complicated and frustrating step! Keep going!
Attach three gusset brackets flush to the end of the three shorter extrusion like this.
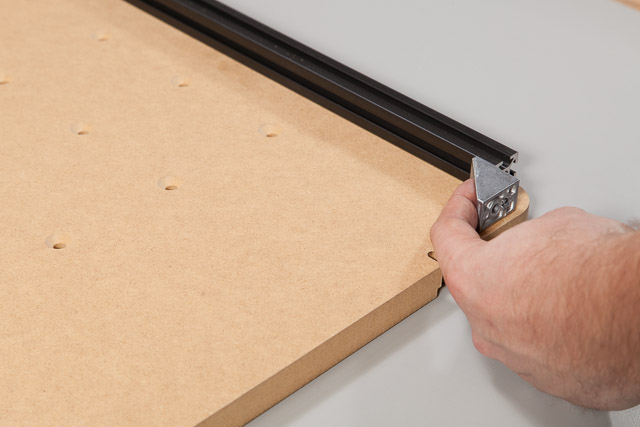
Slide three insertion nuts into your second piece of longer extrusion and space them so they line up with the gusset brackets you just installed.

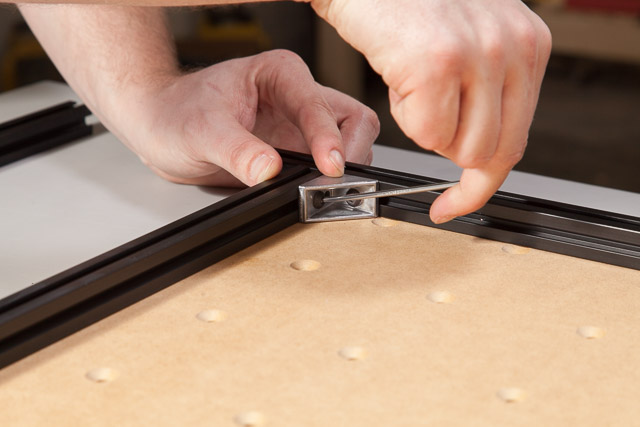
Rotate the long extrusion ninety degrees away from the waste board and put four insertion nuts and four 20mm screws into it like this:

Rotate the extrusion back towards the waste board and slide the screw heads into the remaining slots on the waste board.

Use your wrench to line up the insertion nuts with the gusset brackets and fasten them with your remaining M5 x 10mm screws.


Now flip the whole assembly back over one more time and tighten all of the M5 x 20mm screws, including the two screws in the middle of the waste board.
If you purchased drag chain with your 1000mm X-Carve now’s the time to install the last bracket to hold it in place.
5. Mount the Drag Chain Bracket
| 1000mm Drag Chain Kit | ||
| SKU | Name | Quantity |
| 30586-02 | Drag Chain Extrusion Angle Bracket | 1 |
| 25281-05 | T-Slot Nut M5 Pre-Assembly | 2 |
| 25286-17 | Button Head Cap Screw M5 x 8mm | 2 |
| 30554-01 | Flat Head Socket Cap Screw M4 x 10mm | 2 |
| 30265-03 | Nylon Insert Lock Nut M4 | 2 |
| 30331-09 | Female Drag Chain End | 1 |
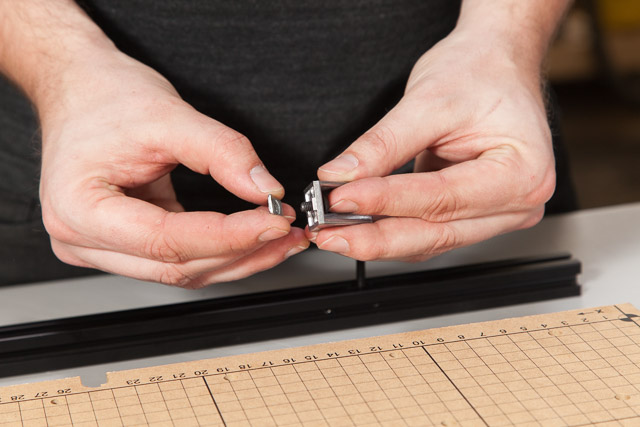
Attach the female drag chain end to the angle bracket like this (note: use the two smaller holes on the bracket):
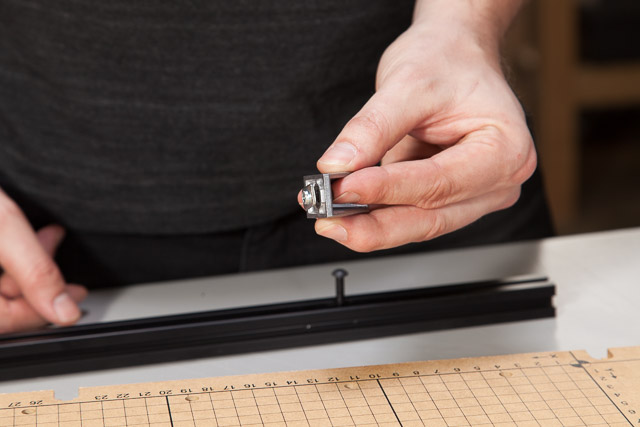
Use two insertion nuts and two M5 x 8mm screws to attach the assembly to the front of the work area like this:
Tape the wires that will travel with the Gantry to the bundle of wires that came through the X-Axis drag chain. Thread all wires through the Y-Axis drag chain.
6. Attach the Work Area to the Rest of Your X-Carve
| Core Components Kit | ||
| SKU | Name | Quantity |
| 25281-05 | T-Slot Nut M5 Pre-Assembly (Insertion Nut) | 8 |
| 25286-17 | Button Head Cap Screw M5 x 8mm | 8 |
Place your X-Carve on top of the work area and fasten each of the four end plates with insertion nuts and M5 x 8mm screws like this:

Congratulations, you have just one more step to go!