Work Area
| 1000mm Rail Kit | ||
| SKU | Name | Quantity |
| 25281-10 | T-Slot Nut M5 Pre-Assembly | 12 |
| 26018-01 | Extrusion Bracket (Gusset) | 6 |
| 26049-02 | Aluminum Extrusion 20mm × 20mm Black 1000mm Lg | 2 |
| 26049-04 | Aluminum Extrusion 20mm × 20mm Black 958mm Lg | 3 |
| 25286-36 | Button Head Cap Screw M5 x 10 | 12 |
| 1000mm Waste Board Kit | ||
| SKU | Name | Quantity |
| 25281-11 | T-Slot Nut M5 Pre-Assembly | 14 |
| 30537-01 | 1000mm Waste Board | 1 |
| 30517-09 | Threaded Insert M5 x 10 | 144 |
| 25286-42 | Button Head Cap Screw M5 x 20 | 14 |
In this section you'll be assembling the work area of your machine (completed image above).
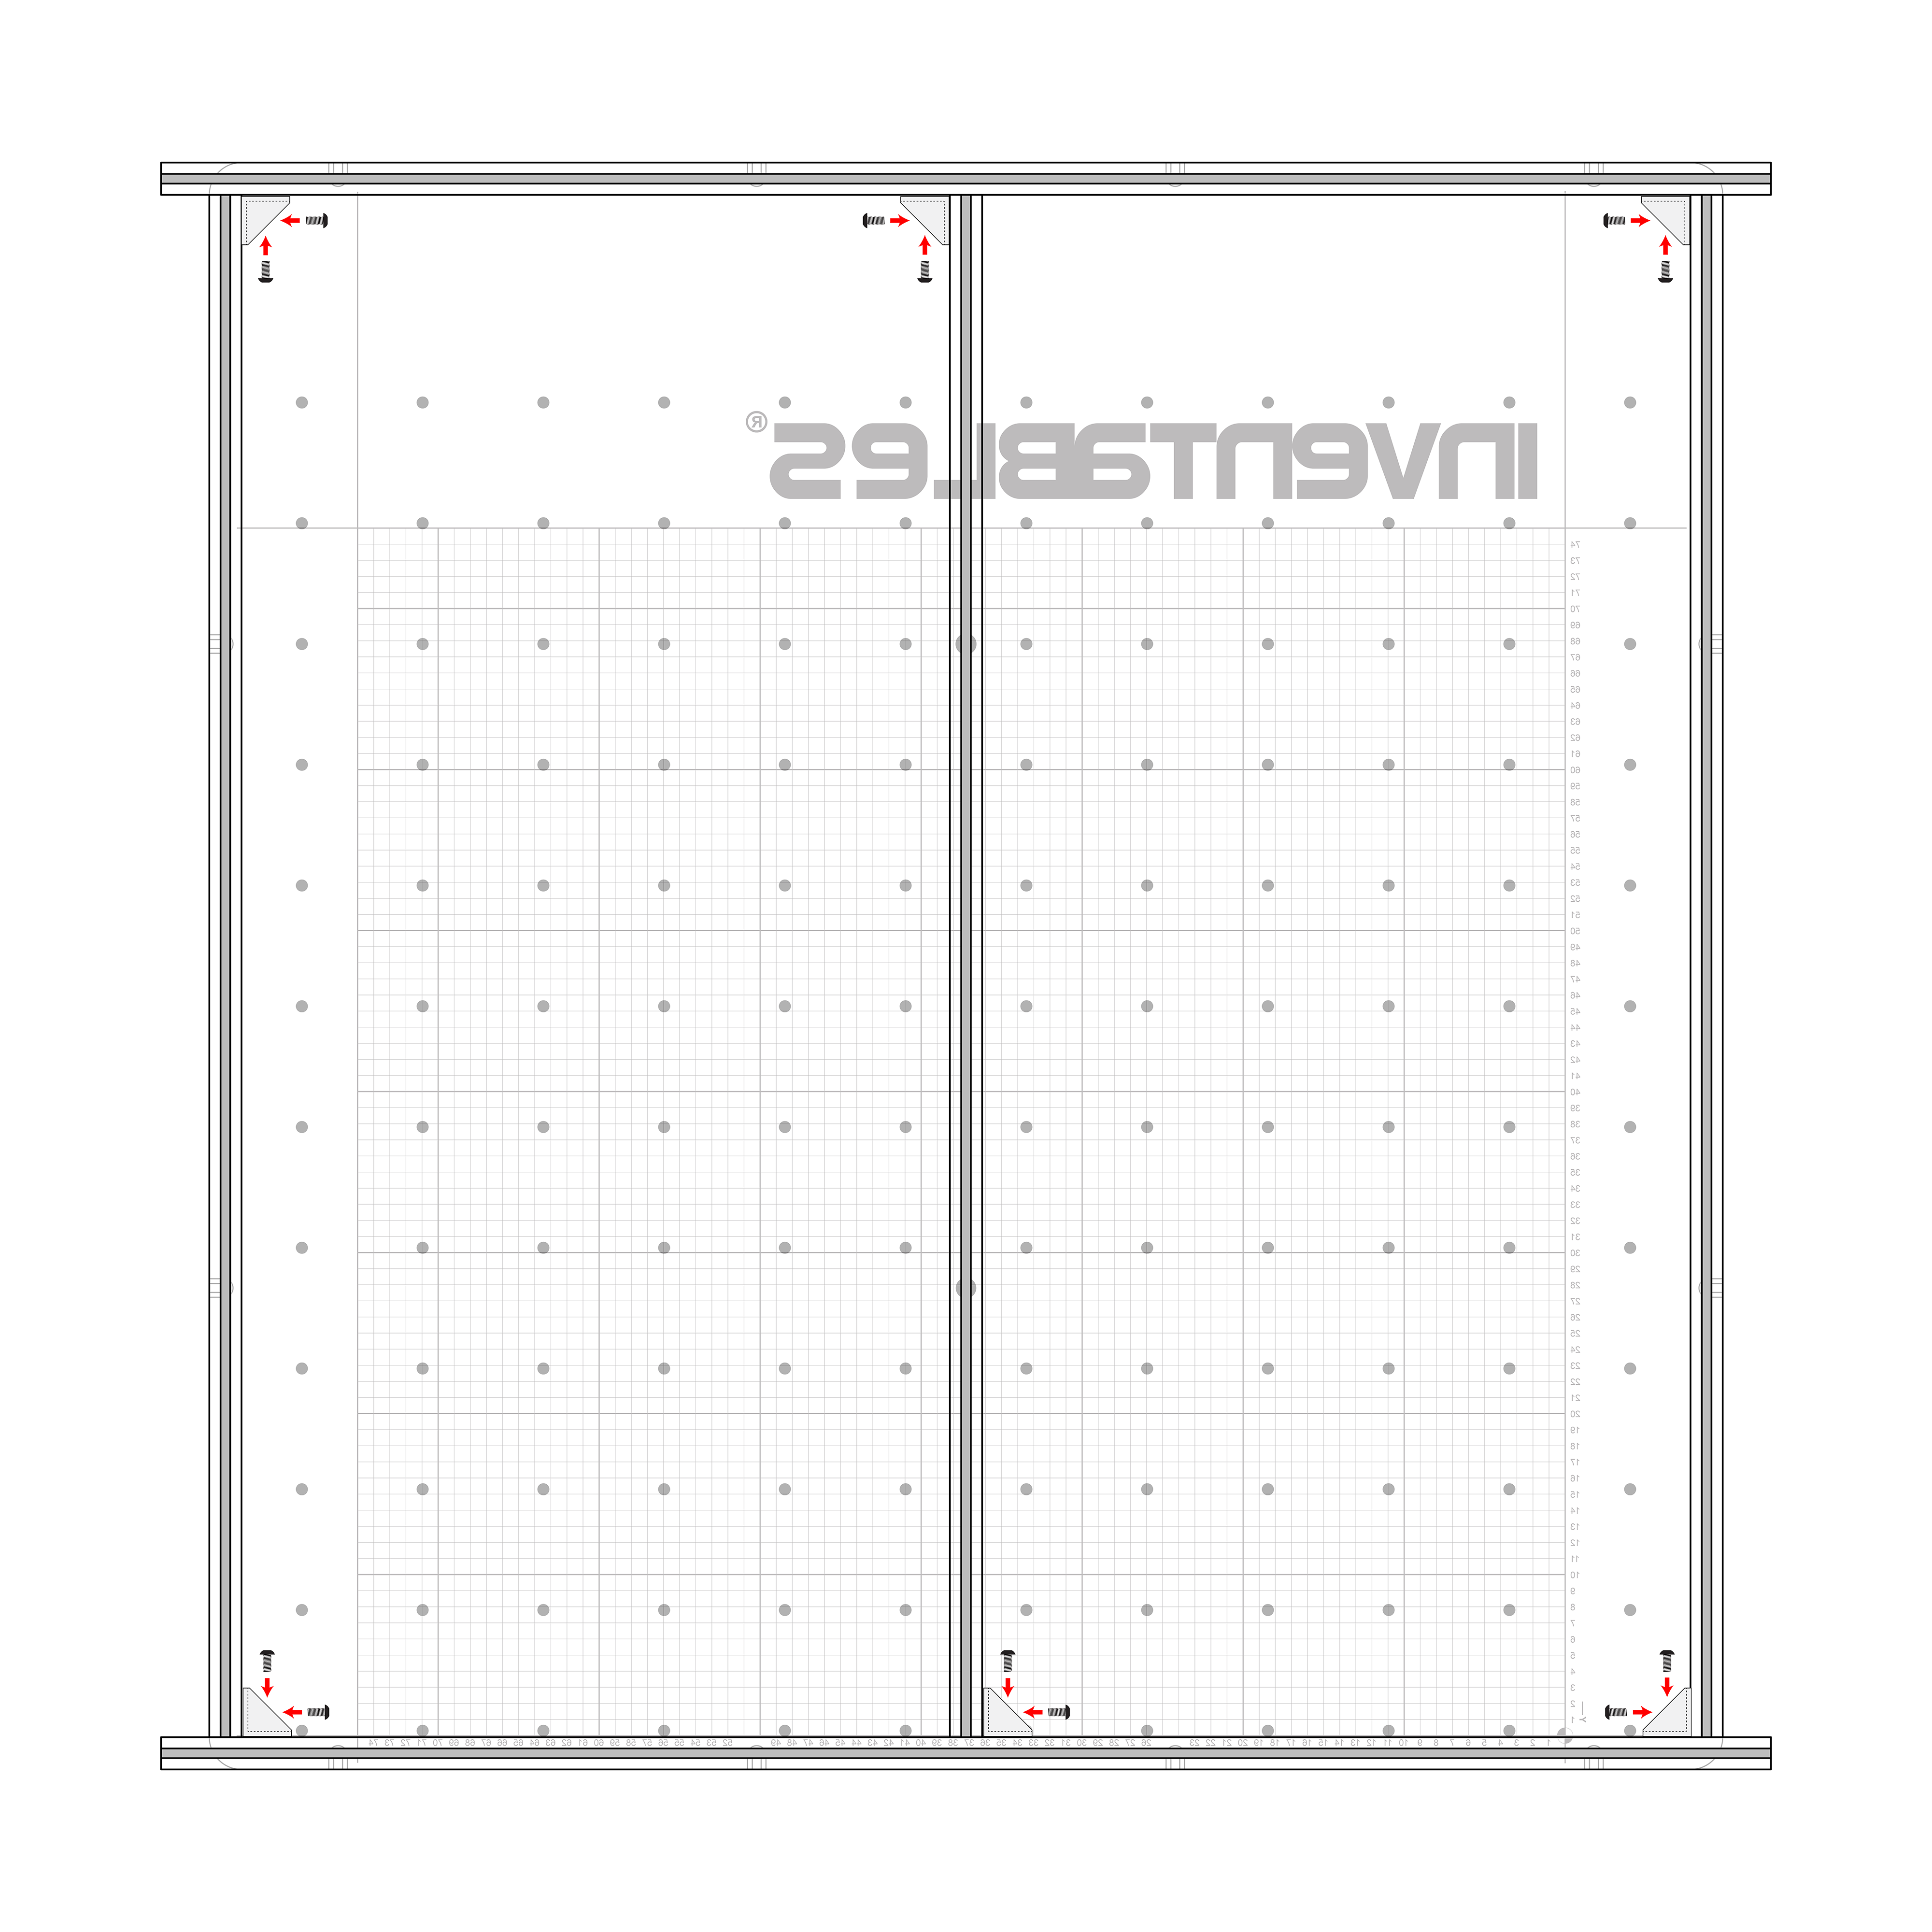
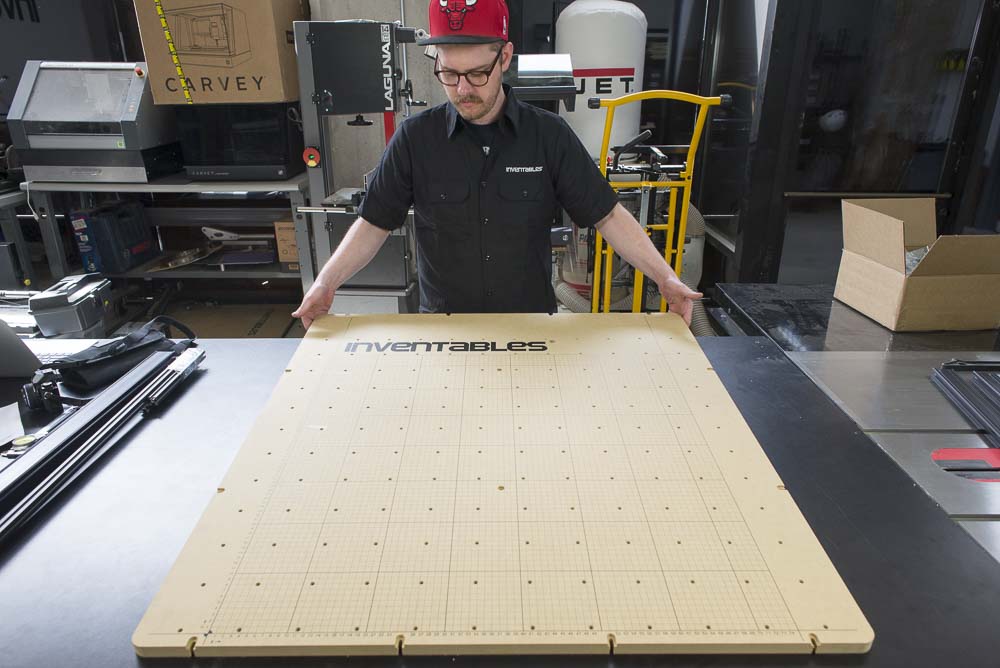
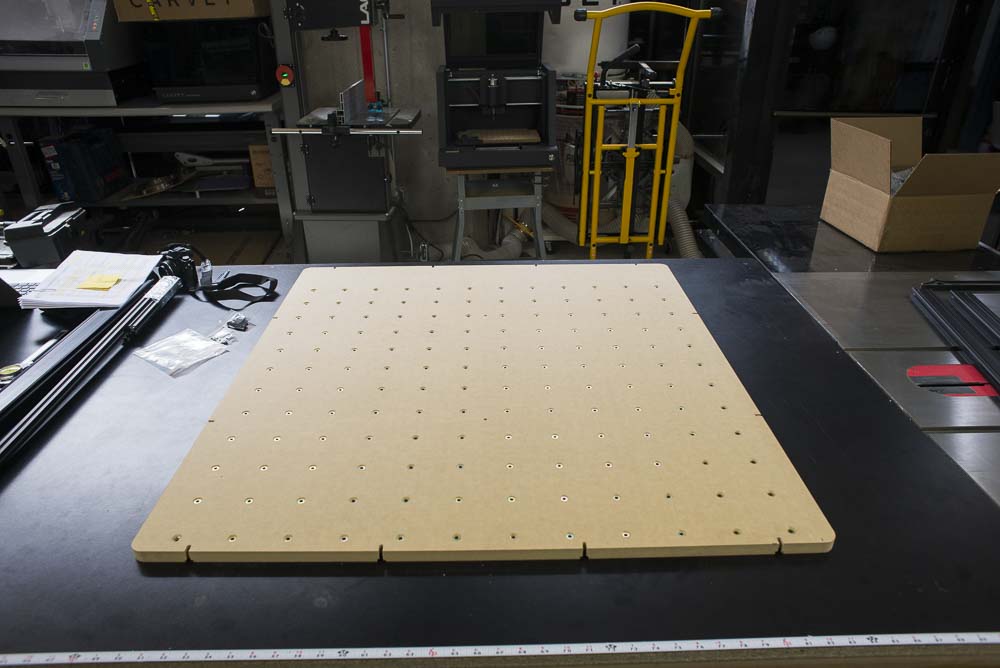
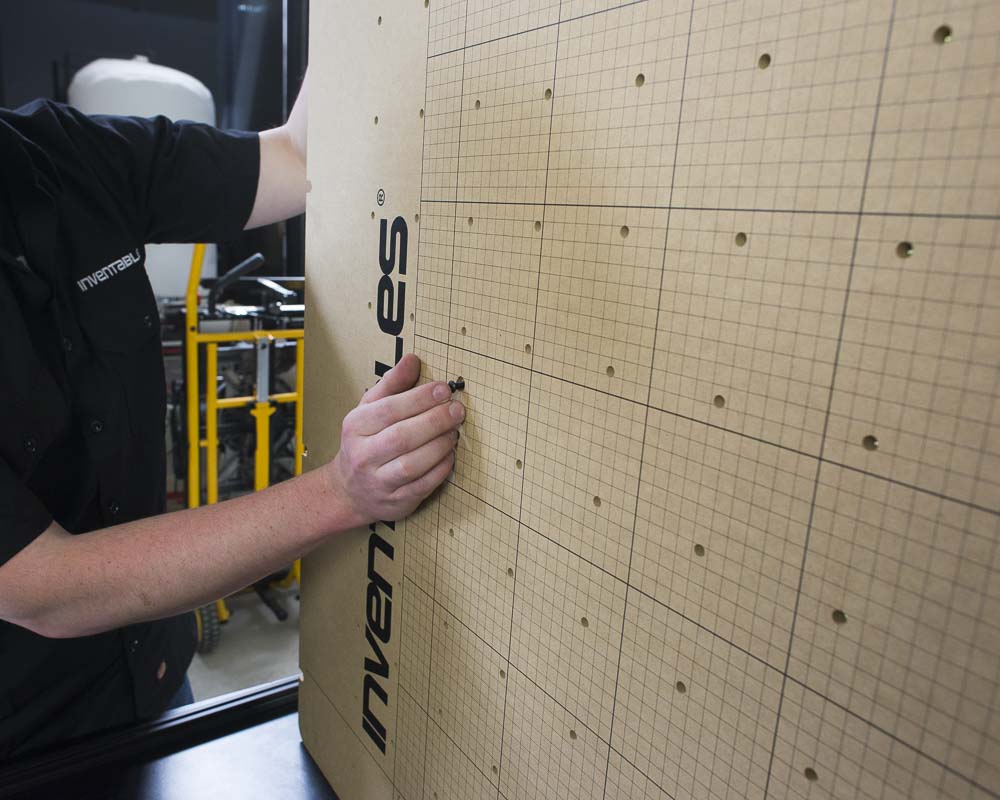
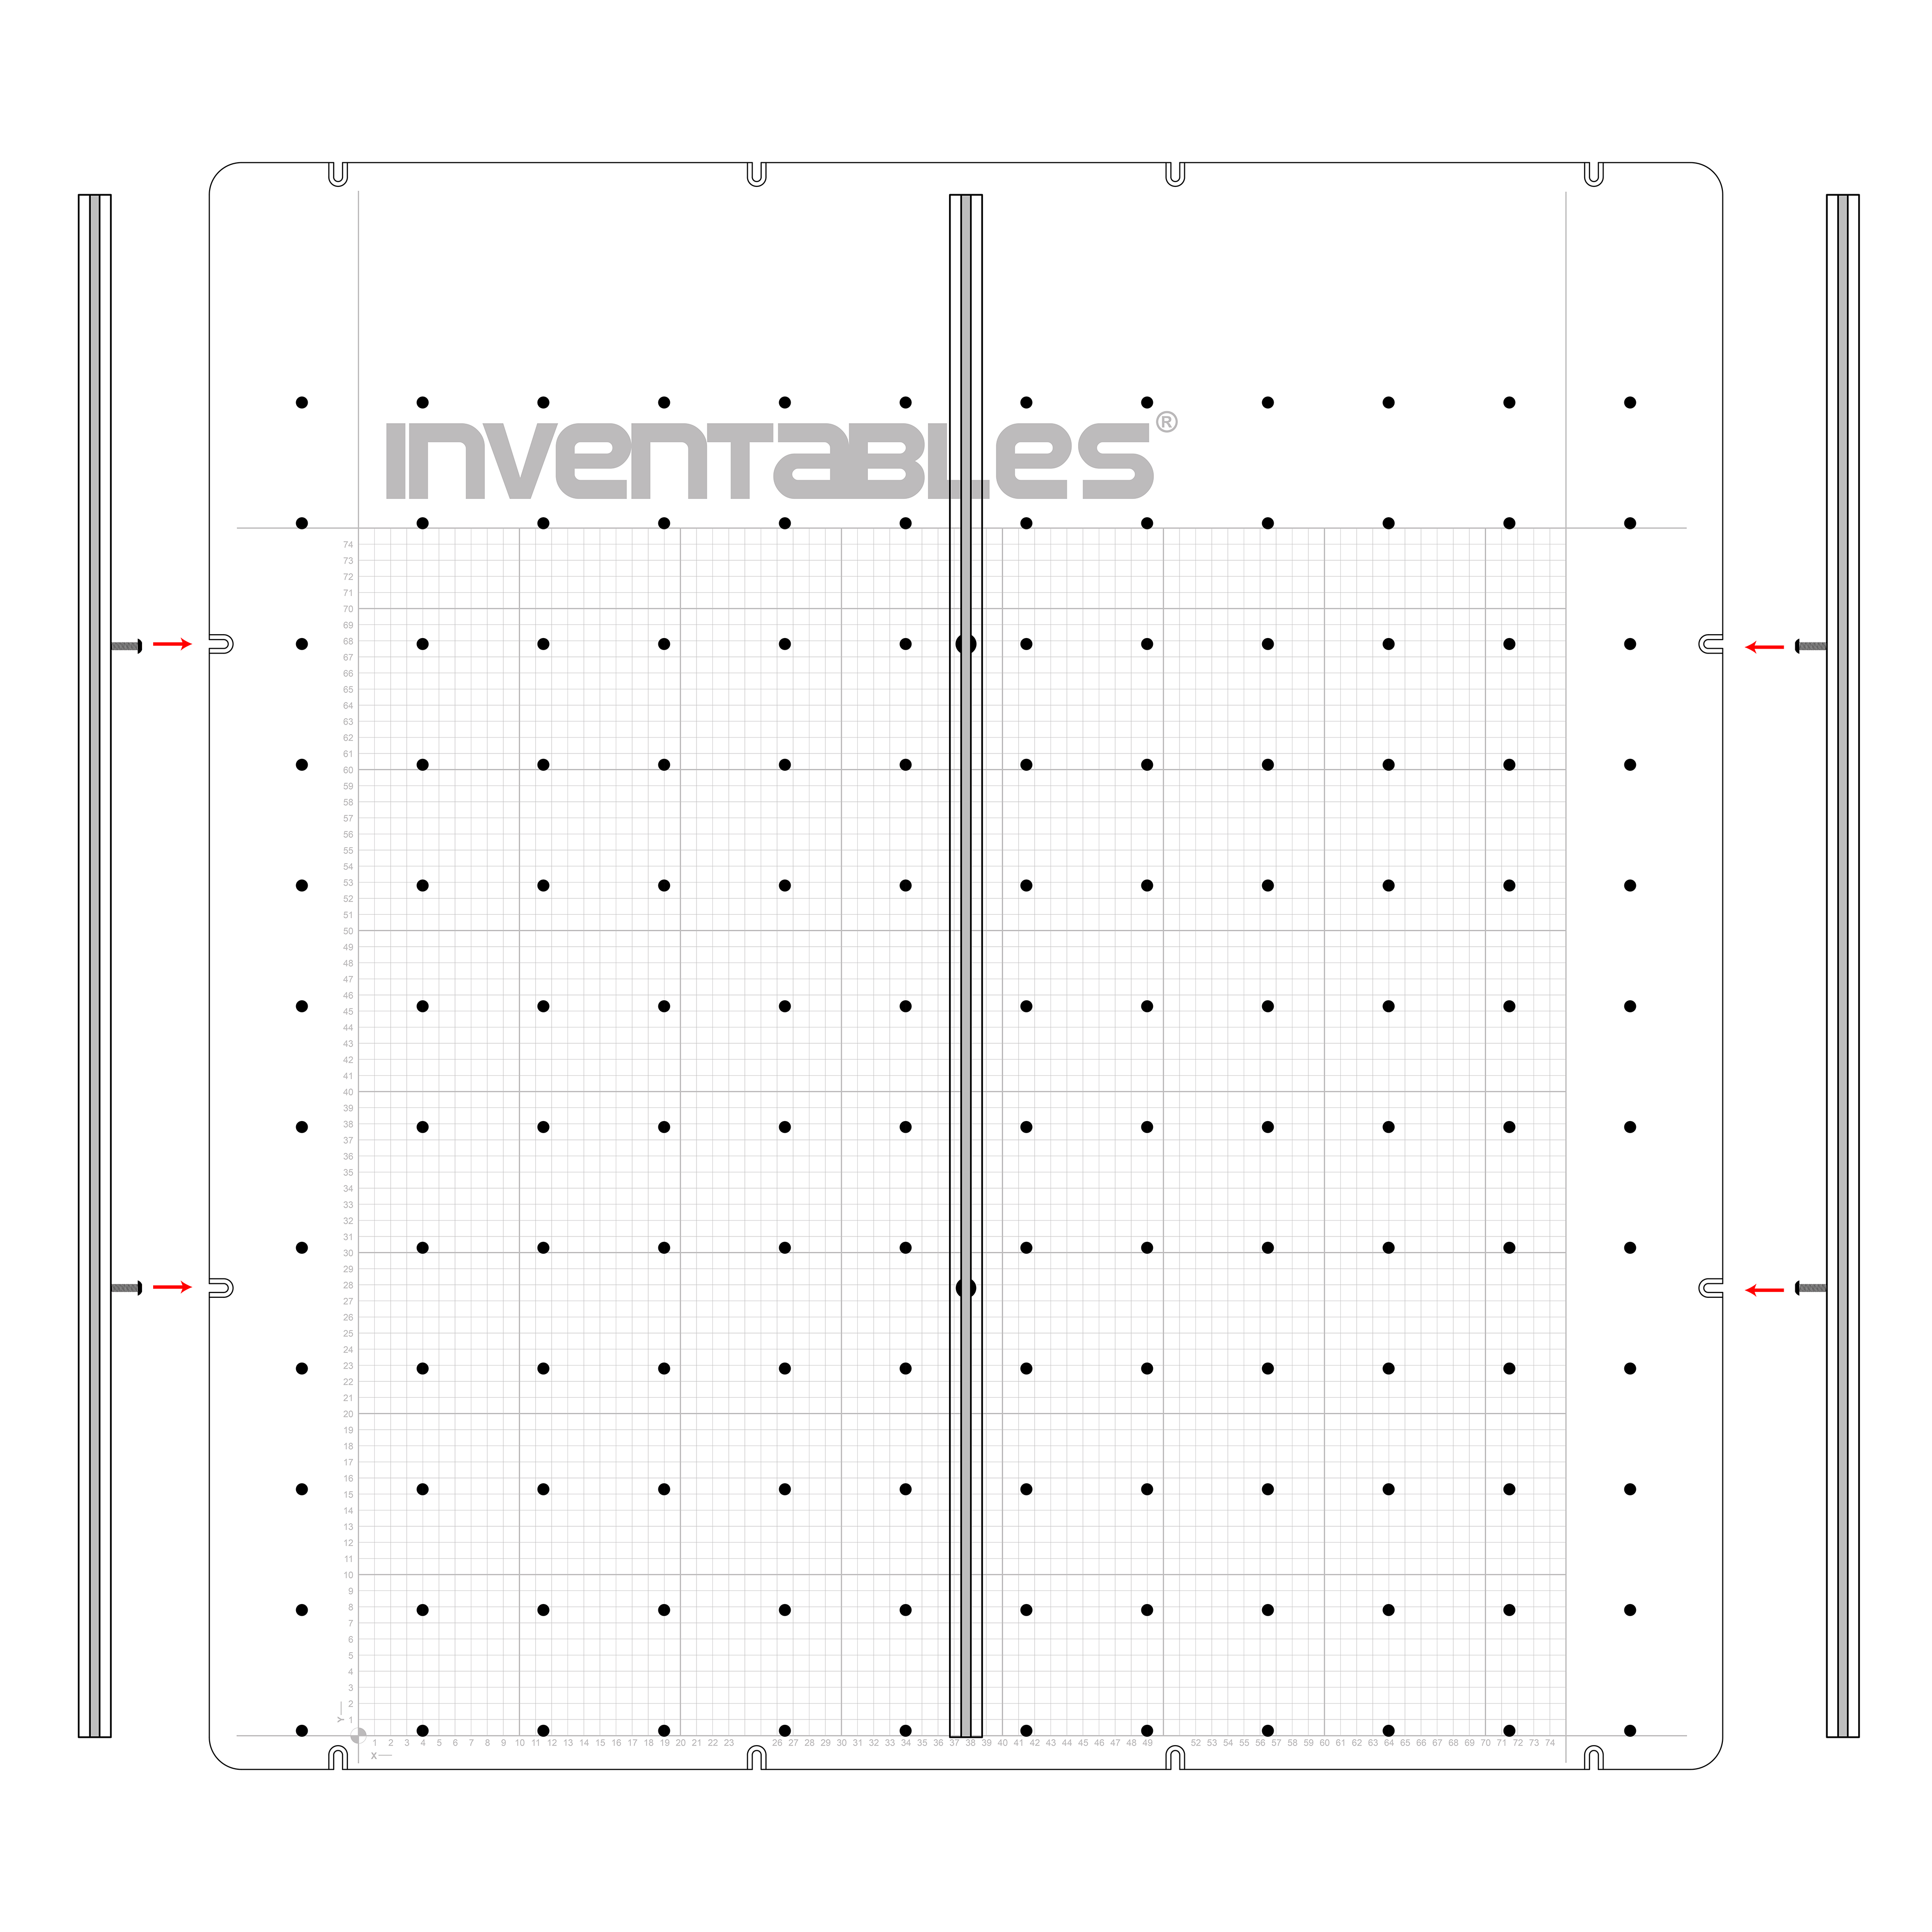
This is the top of your waste board. Note that there are 144 holes for clamping in a 12 x 12 grid, 12 counter-sunk slots around the outside of the board, and two counter-sunk holes running in a vertical line down the center of the board
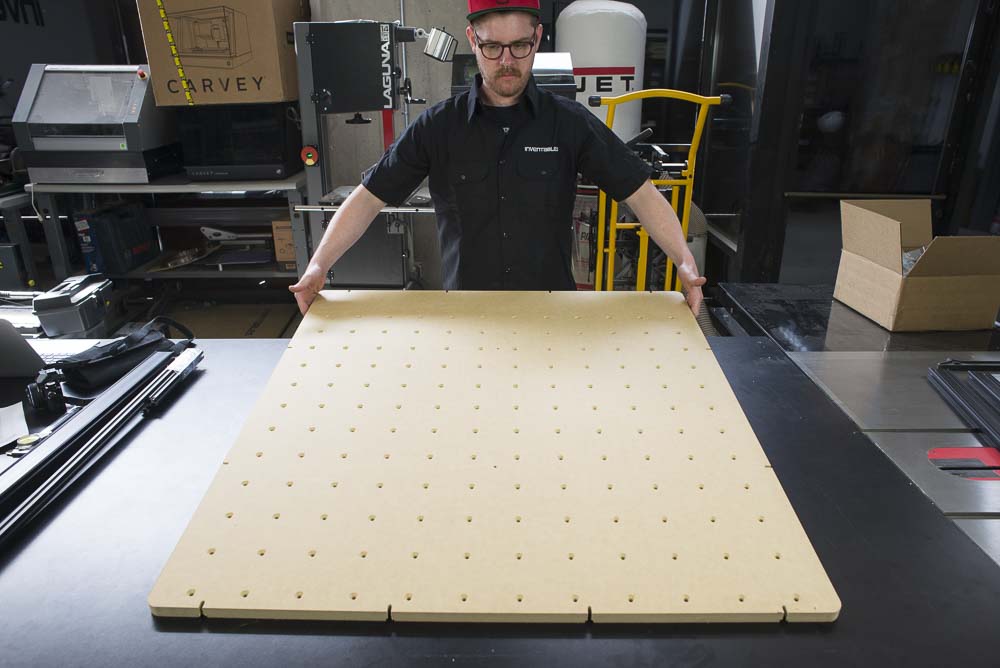
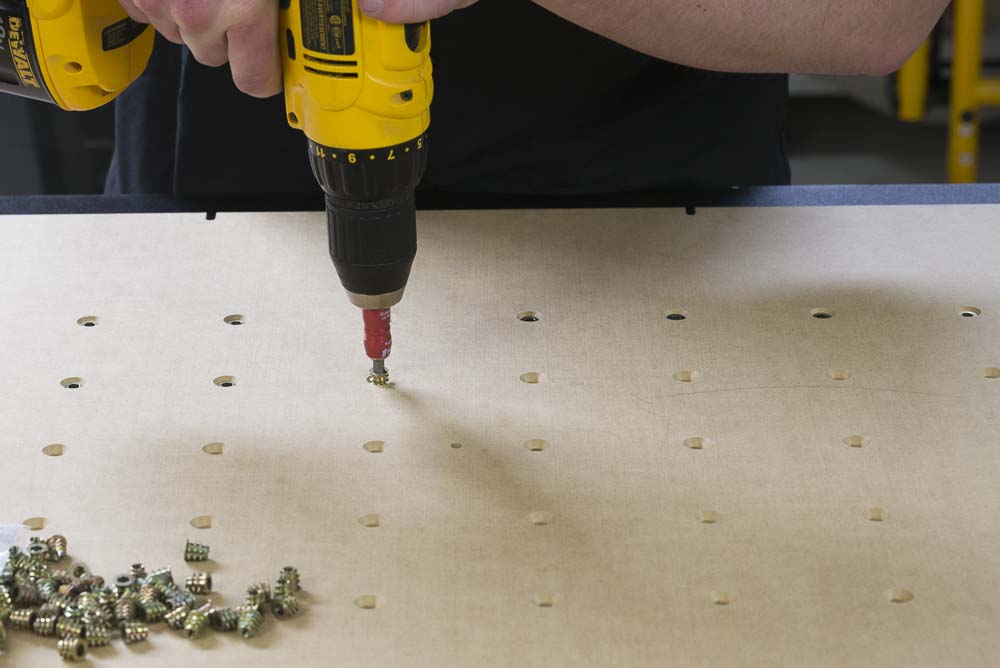
We'll begin by installing the 144 threaded inserts into their holes. Flip over the waste board. The holes are counter-sunk at a bevel from the back to accept the inserts.
You'll want to use a drill driver with a 5mm hex bit to speed this process up. These tools are not included in the tool kit.
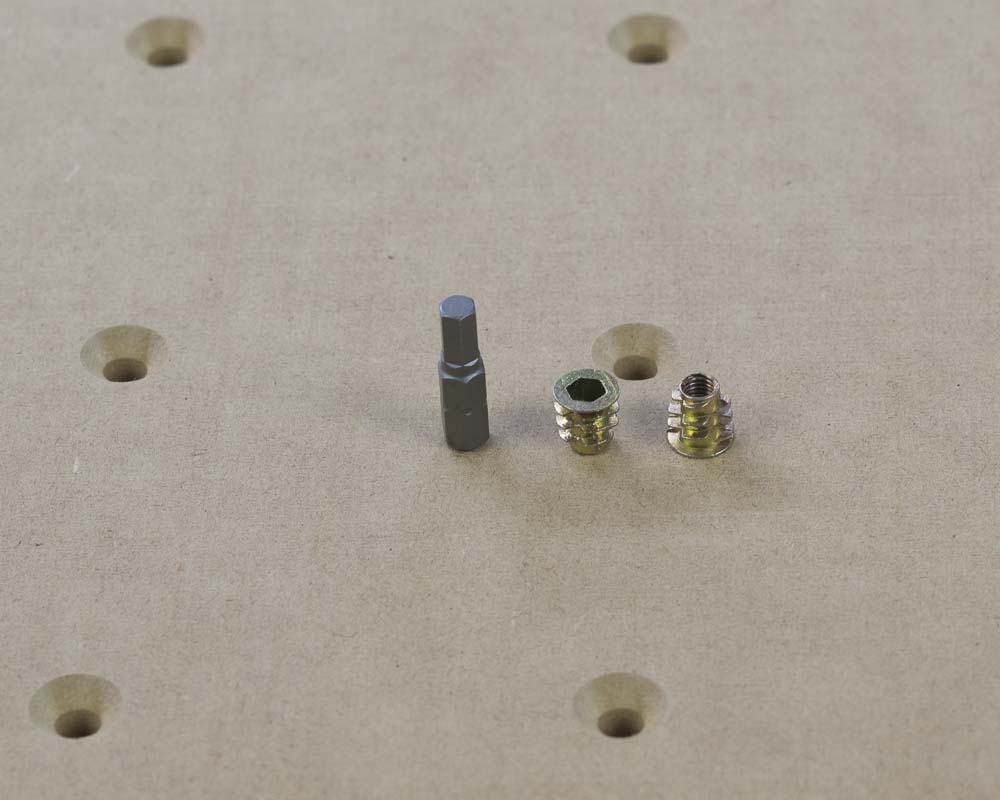
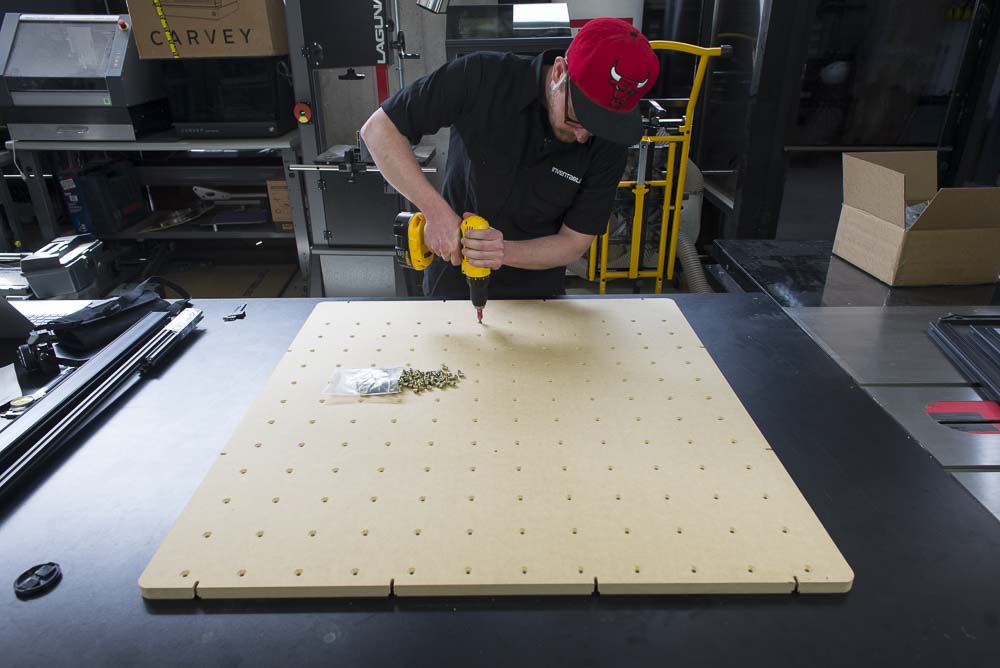
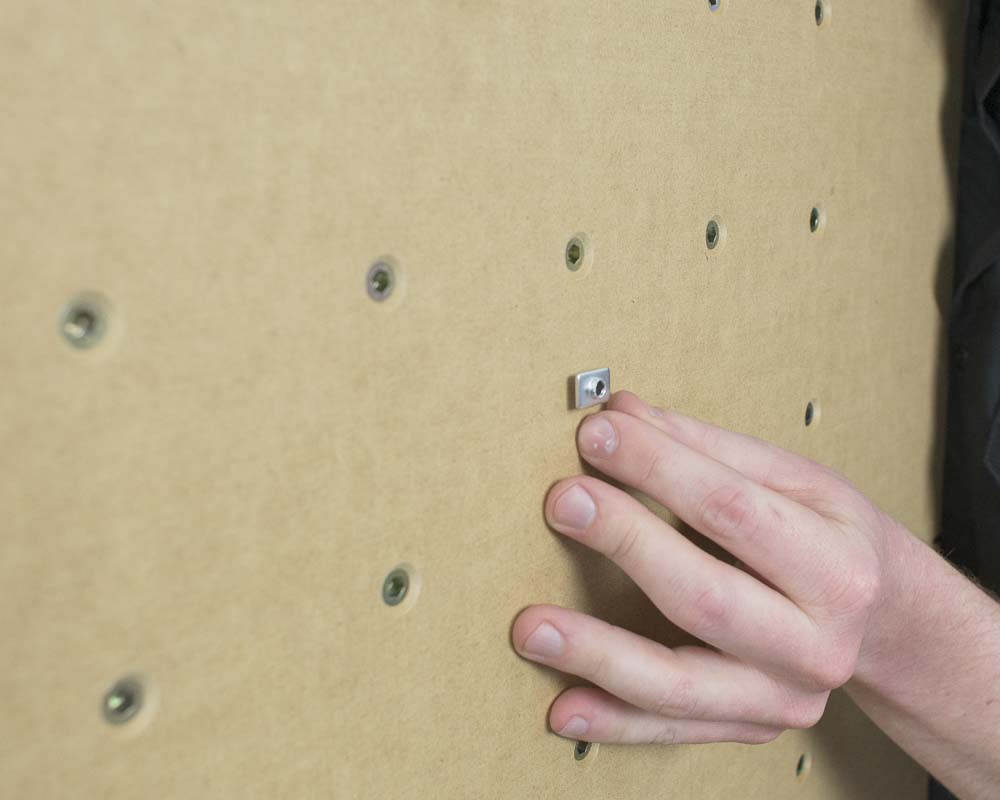
The threaded inserts should fit neatly into the beveled holes. Make sure that you install them as straight as possible as this will make clamping material much easier.
The board should look like this when complete:
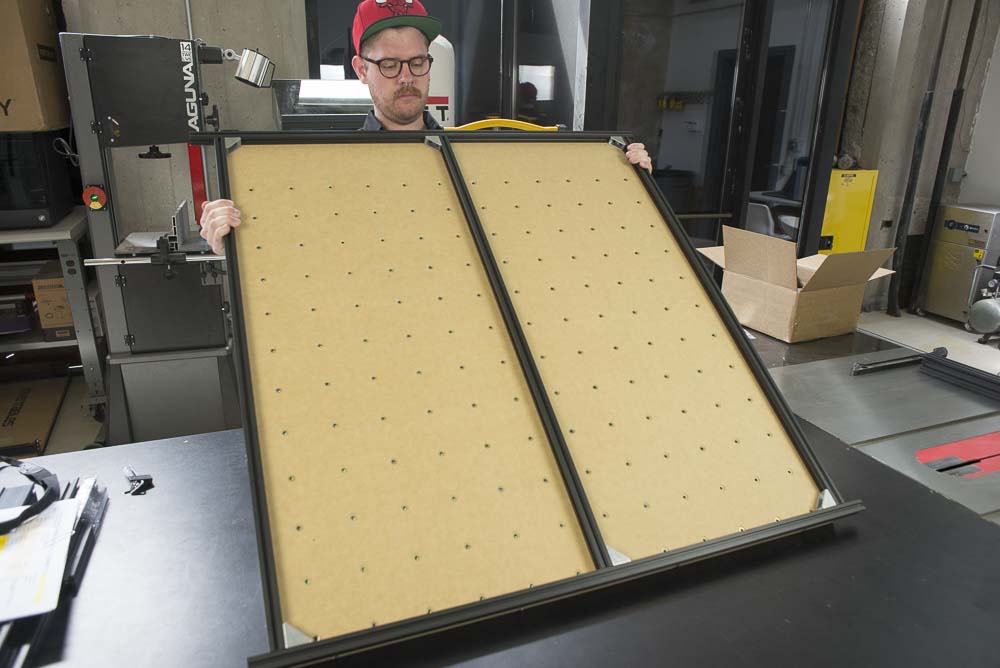
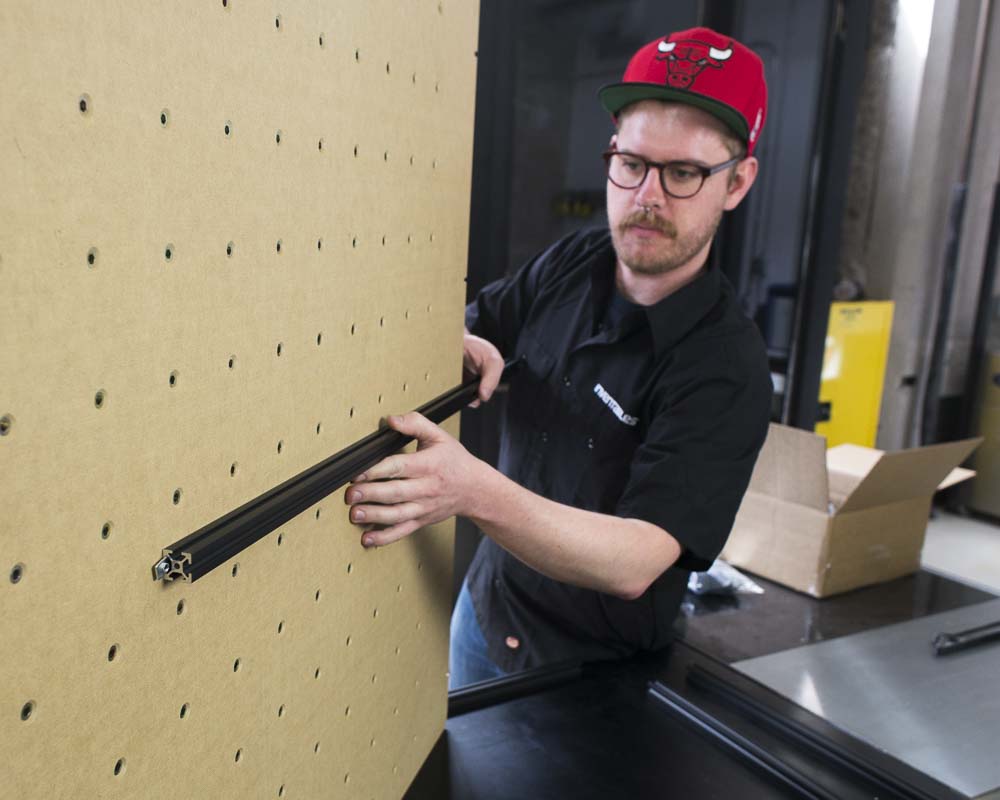
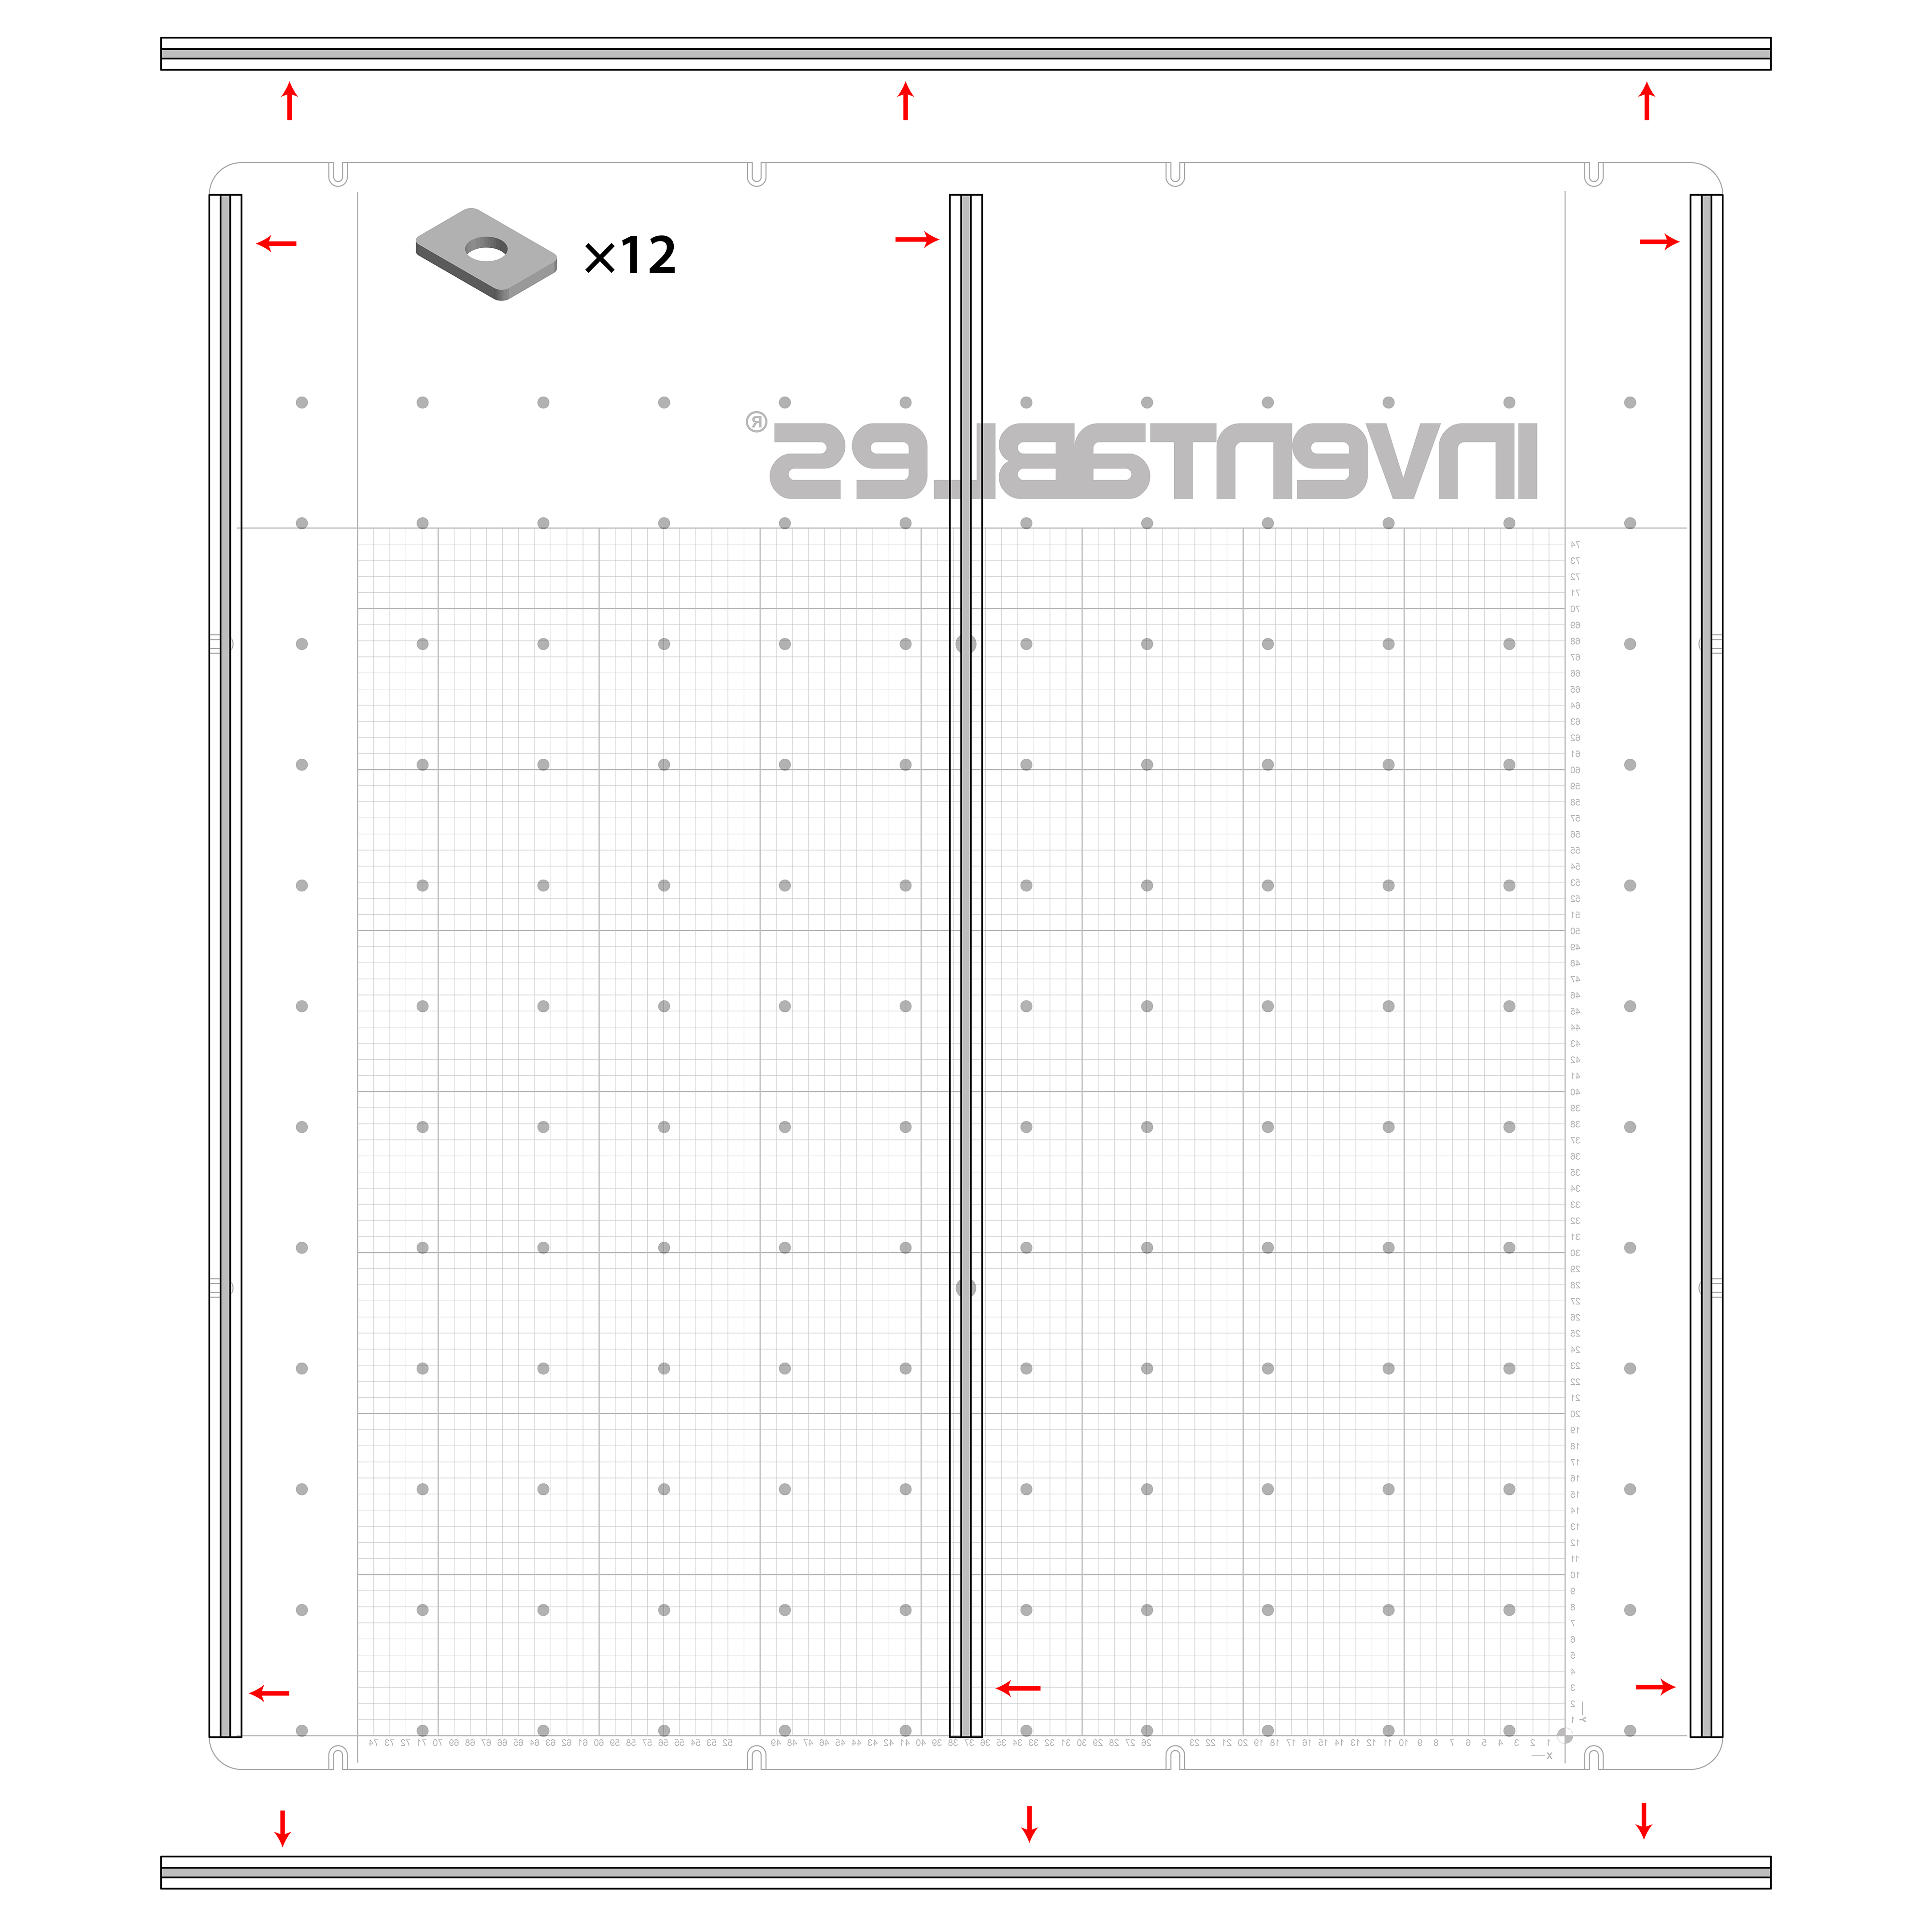
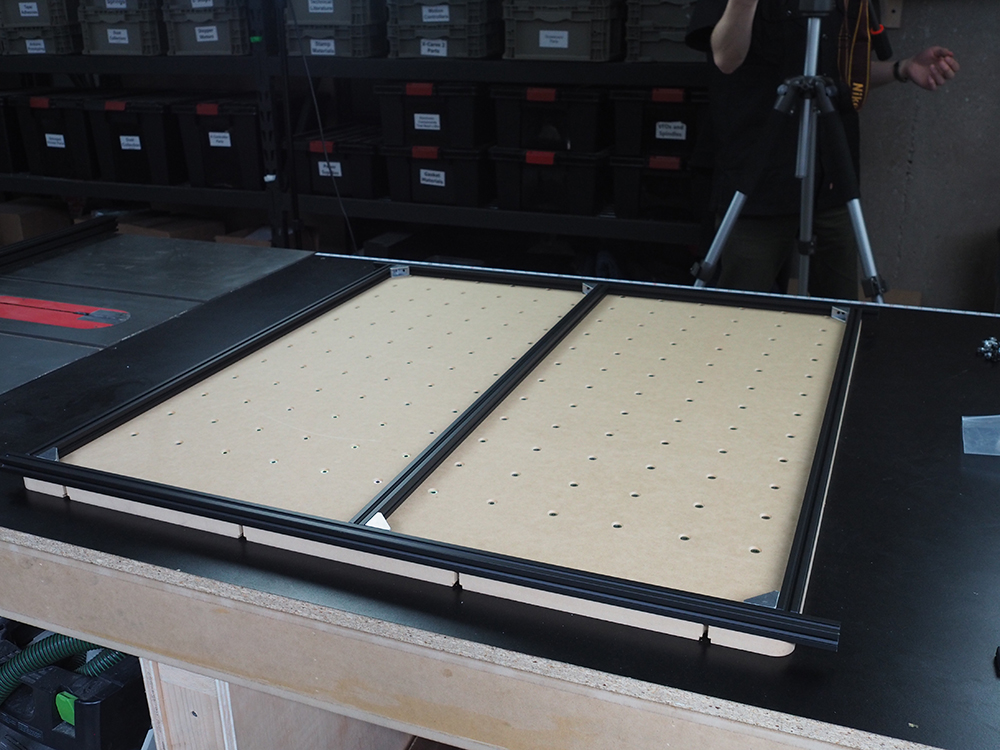
These are the five extrusion rails that make up the base of your work area. Note that there are three 958mm rails and two 1000mm rails. The 1000mm rails will run side to side on the front and back of the board and the three 958mm rails will run back-to-front. The rails are attached to the board with M5x20mm button head cap screws and M5 pre-assembly insertion nuts.
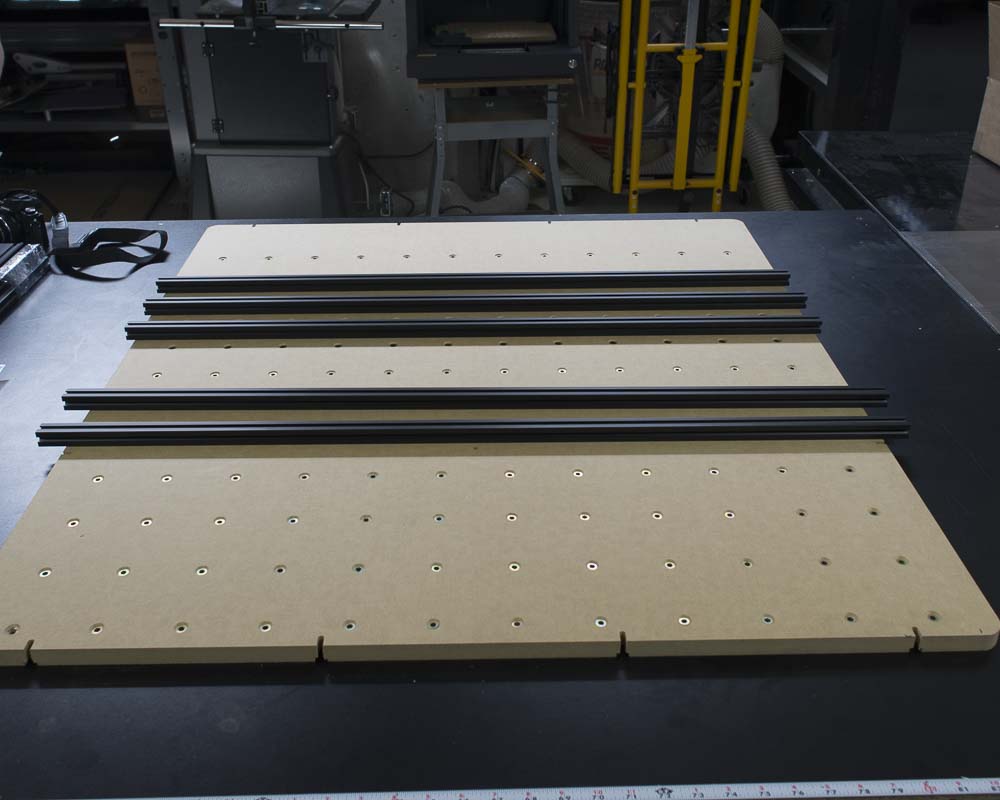
This is how the rails will be arranged once assembled:
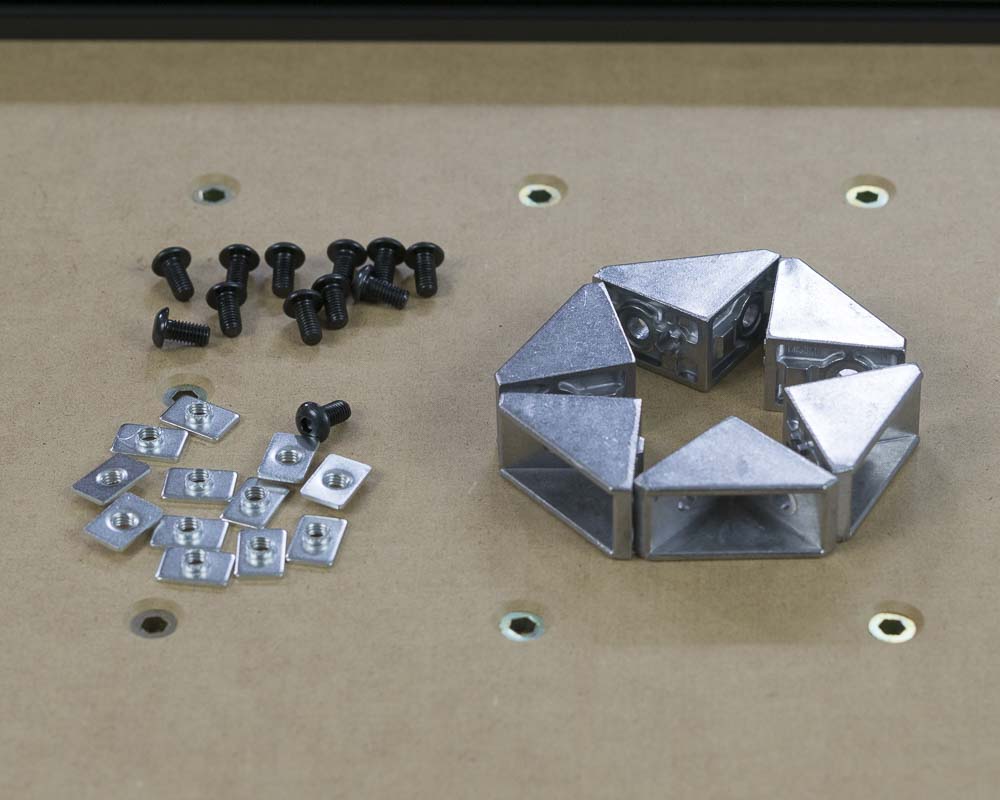
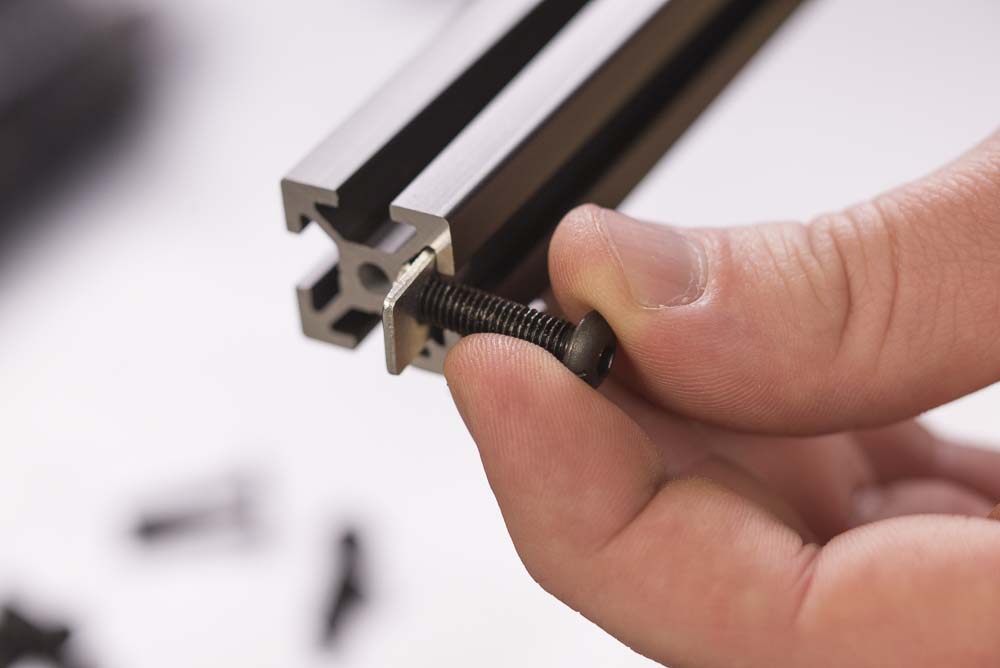
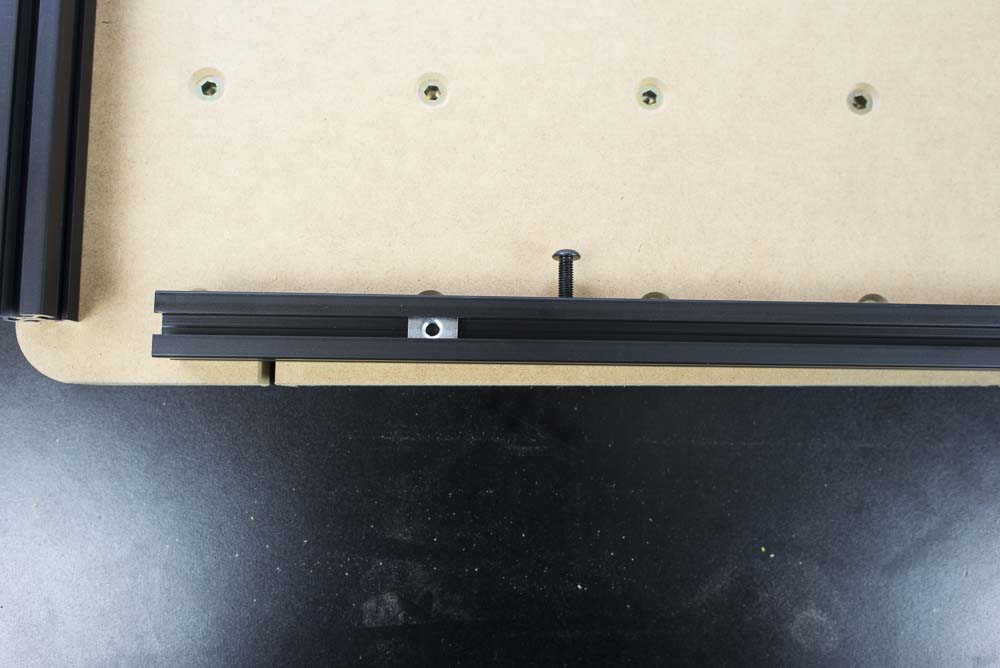
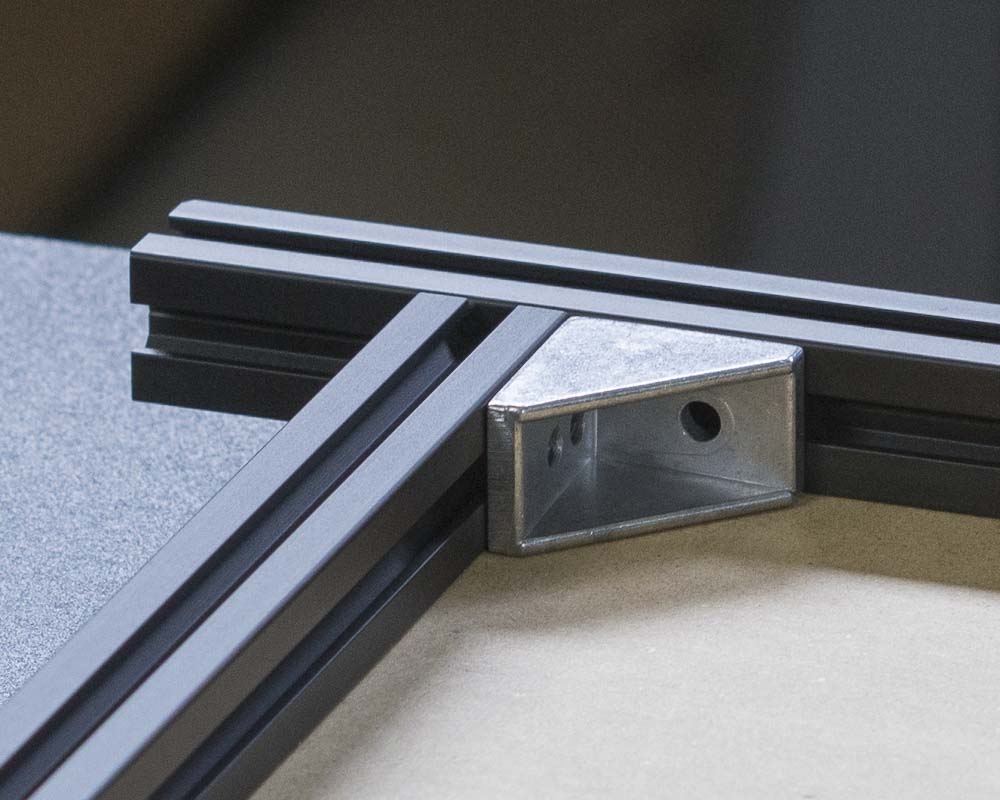
 The extrusions are held to one another using these 6x aluminum angle brackets, 12x M5x10mm button head cap screws and 12x M5 pre-assembly insertion nuts.
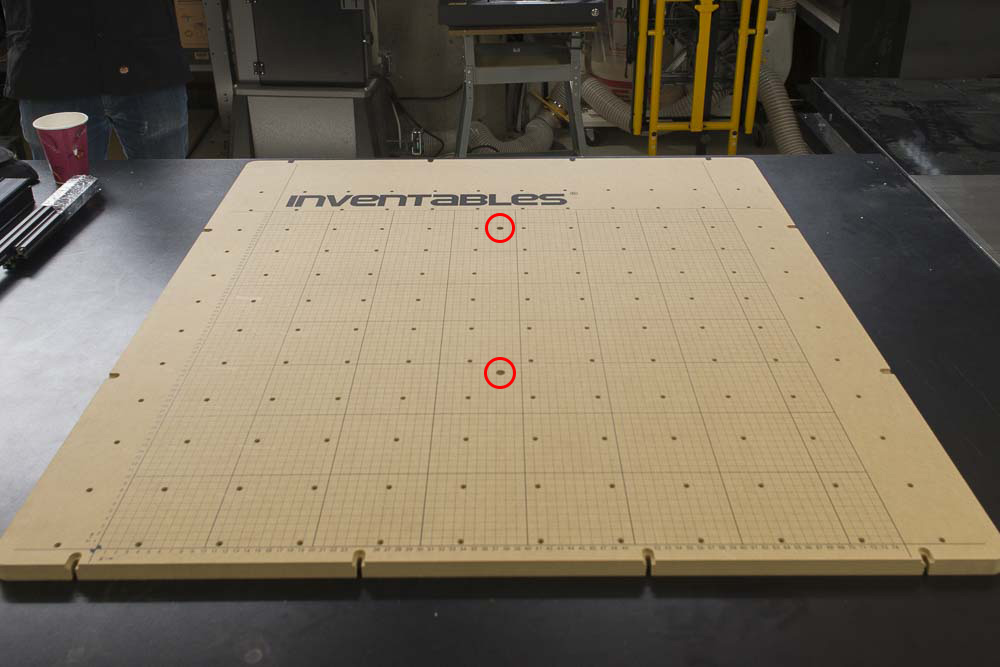
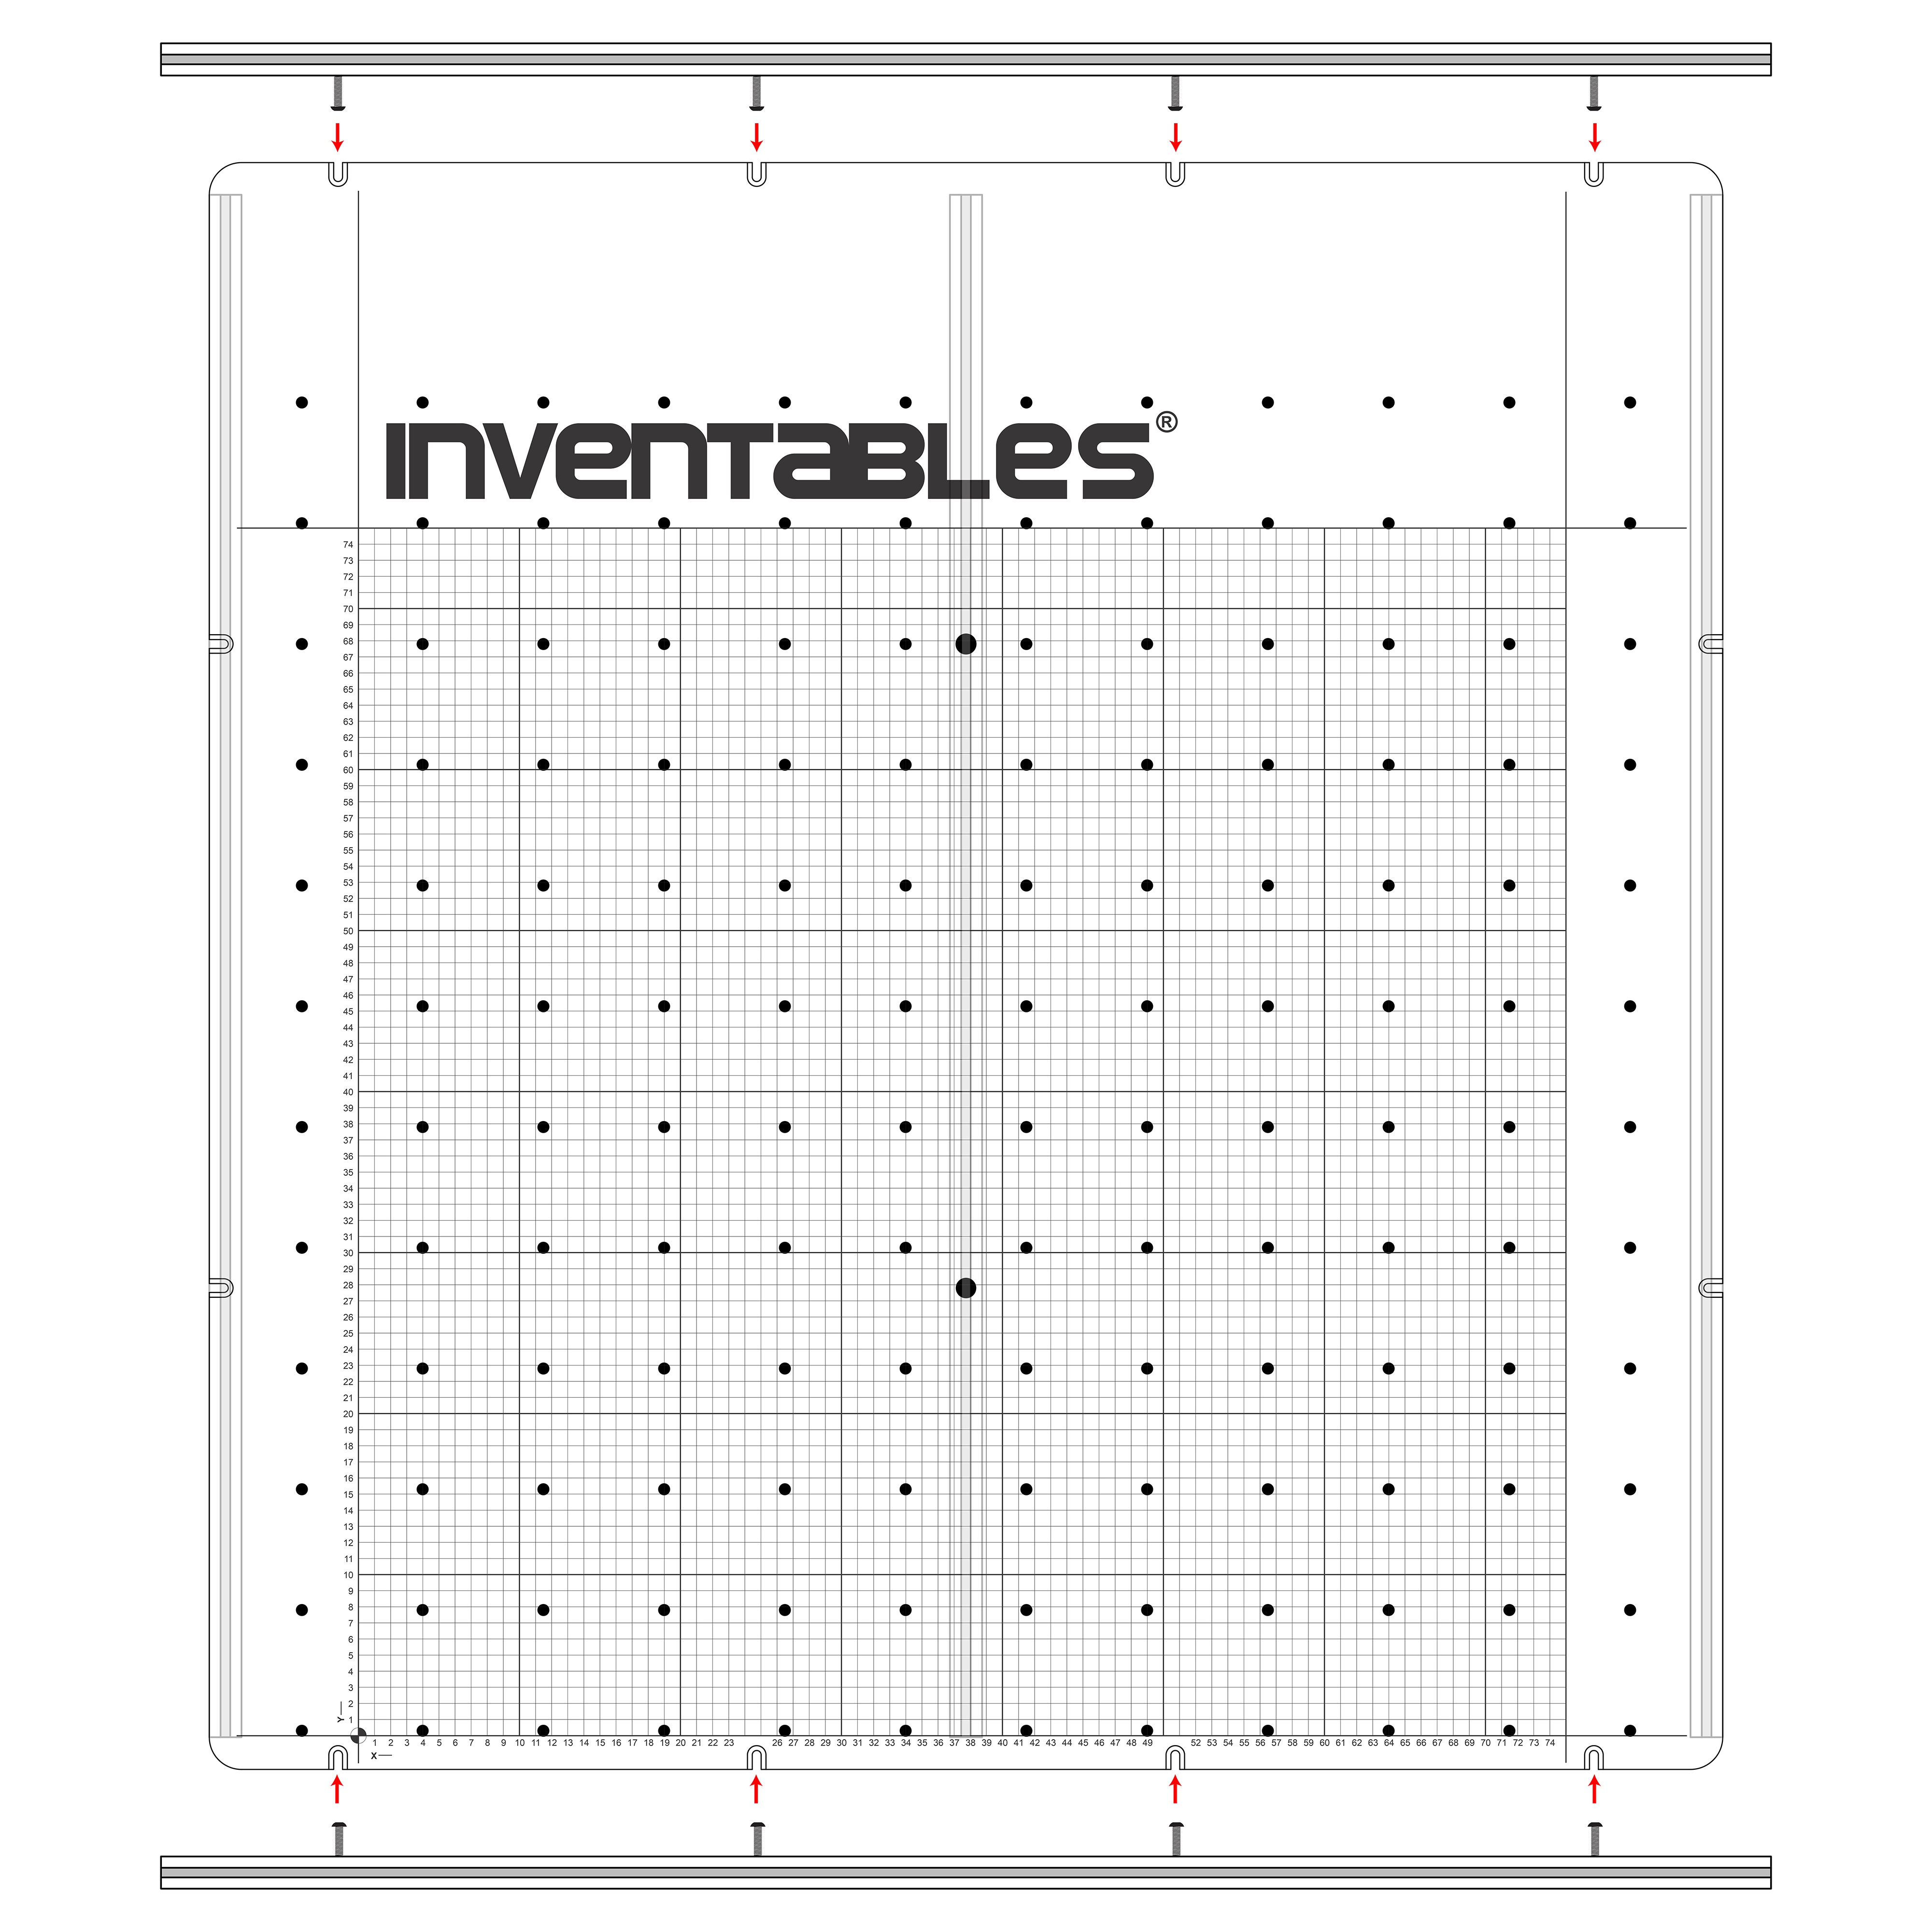
We'll begin by installing the central 958mm extrusion rail. Insert 2 M5x20mm button head cap screws into the center two counter-sunk holes on your wasteboard (marked below).
Loosely thread an M5 pre-assembly insertion nut onto each of the two screws. Make sure that the side with the protrusion is facing away from the board.
Take a piece of 958mm extrusion and slide it over the two insertion nuts down the center of the board. Do not tighten the screws down just yet.
Take the second 958mm rail and insert two M5x20mm screws with pre-assembly insertion nuts already attached. Repeat this for the remaining 958mm rail.
Place the rails on either side of the board, sliding the screws into the counter-sunk slots. The screws are displayed oriented sideways here for illustration, but should be upright when installed.
You'll then want to slide in 12x M5 pre-assembly insertion nuts into the ends of all of the rails before you attach them. This will allow your angle brackets to be mounted on the bottom.
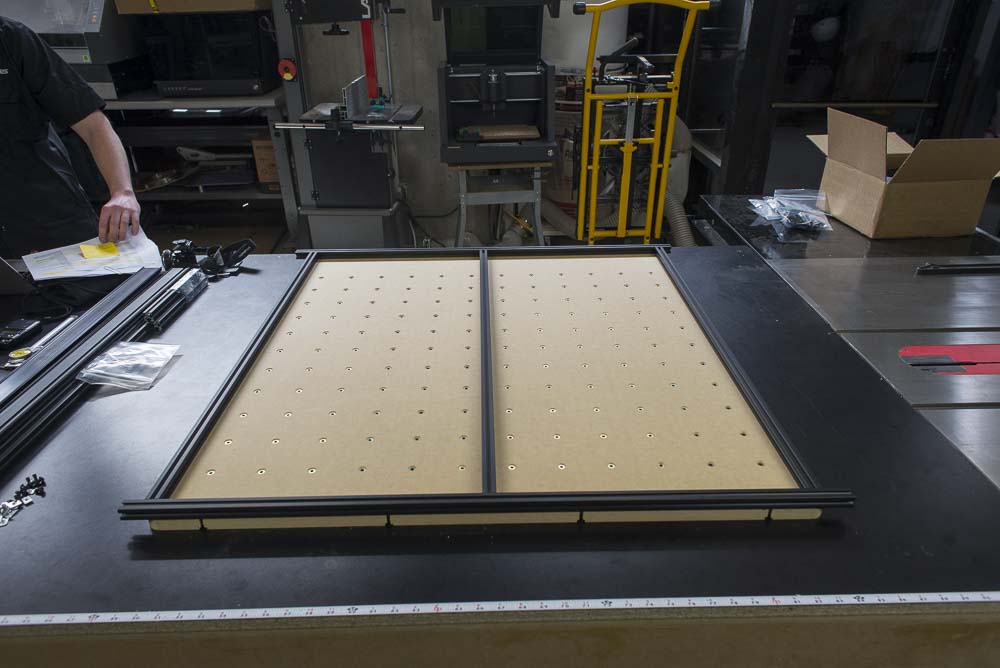
Once you have the nuts inserted, you can install the 1000mm rails on the front and back. You'll want to use M5x20mm button head cap screws and M5 pre-assembly insertion nuts as before. Make sure that the other pre-assembly insertion nuts you installed in the last step are facing inwards so they can be attached to the angle brackets. The front and back rails should hang over the edge of the board by 30mm (1.18") on either side when installed.
Loosely attach the remaining M5x20mm button head cap screws to the aluminum extrusion with insertion nuts. Insert two insertion nuts into each of the smaller extrusions (one on each side of the middle piece) and three insertion nuts into each of the longer pieces. Insertion nuts will be used to attach the gusset brackets to the extrusion.
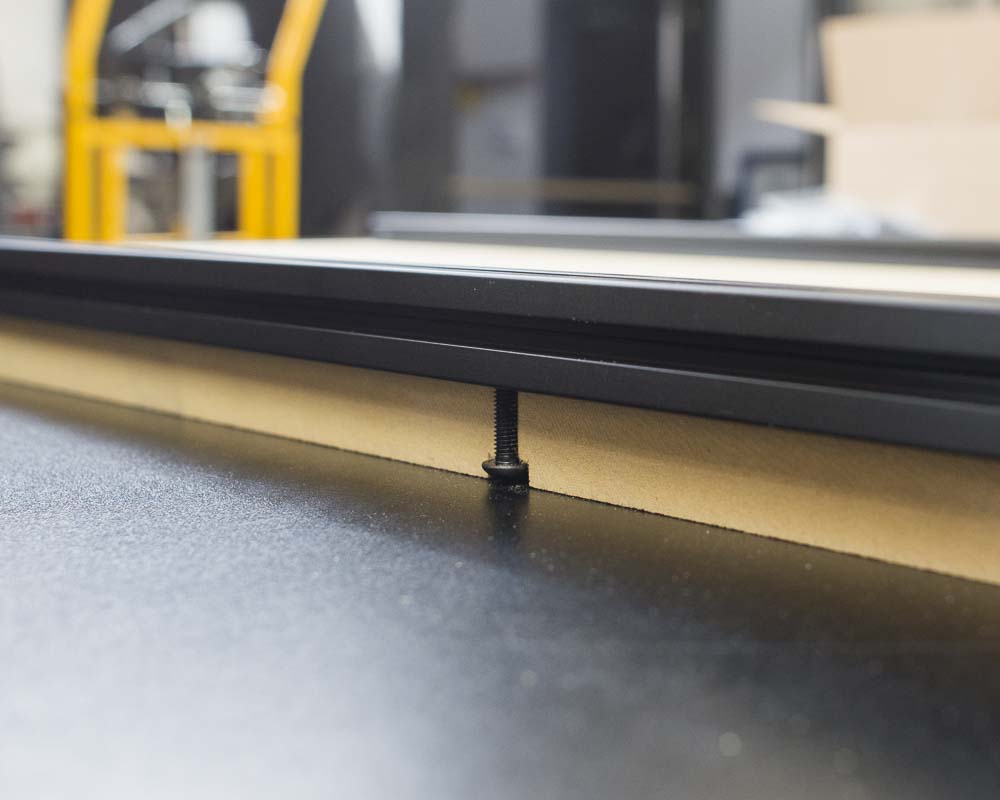
Instead of flipping over the waste board itself to access the head of the screws, flip the rail over and guide the screws into the outer mounting slots on the edge of the waste board.
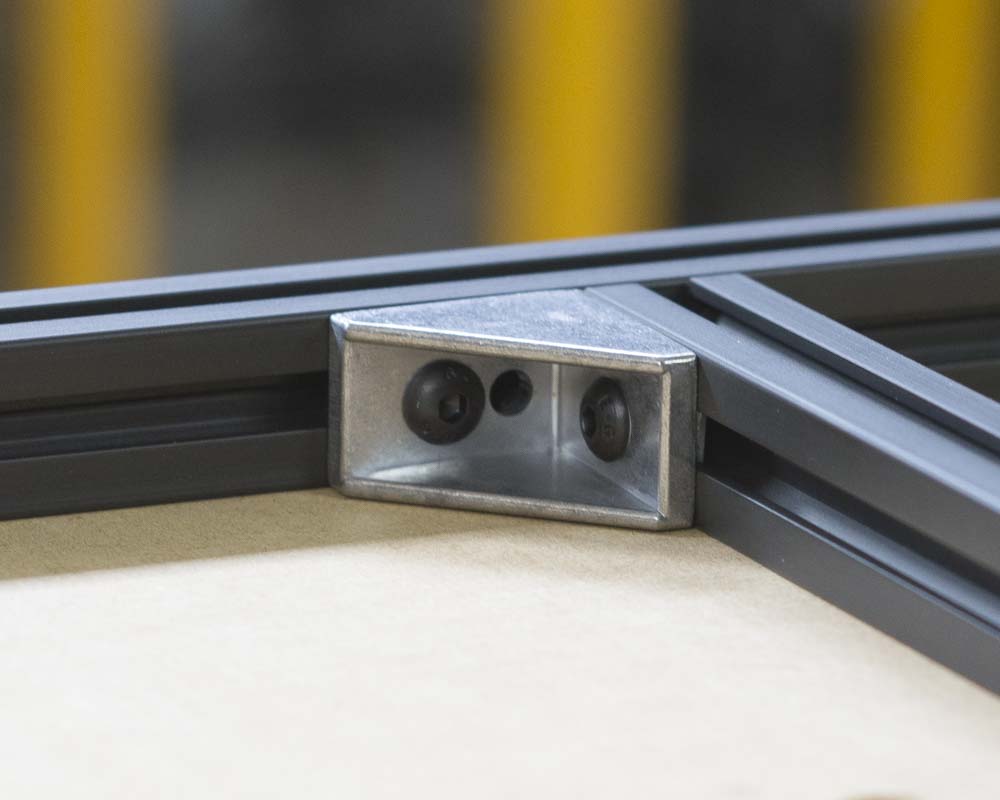
Attach the gusset brackets to the frame using the M5x10mm button head cap screws and insertion nuts. Flip over the waste board and tighten down all M5x20mm button head cap screws to secure the waste board in place.